Showing posts with label party craft. Show all posts

Wednesday, October 22, 2014

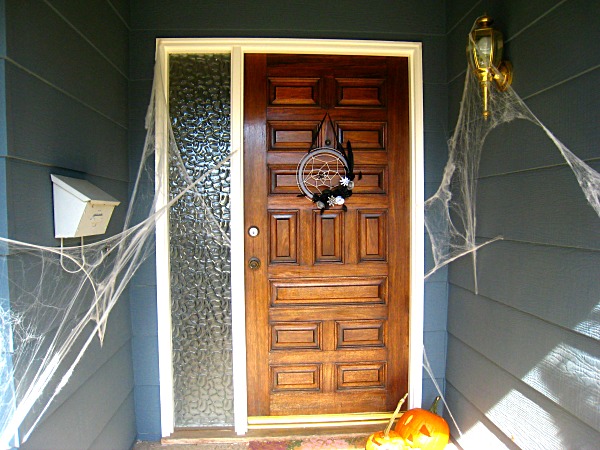
Halloween Spiderweb Wreath

Spiderweb wreath (2).JPG


 Ever hear of the word “Procraftination?” Well, the fact that I’m posting my Halloween wreath a week before Halloween is a prime example. I’m WAAAY behind in the craft world. In blogland, this should have been done a month ago. Like that wise person once said, “Better late than never!”


 I seriously thought about saving this post for a whole year and actually having it prepared for next Halloween, but I just couldn’t wait to share it’s cuteness.


 Have you noticed how popular wreaths are becoming among crafters? Maybe they’ve always been that popular and I’m just now noticing? I thought maybe I better take the plunge and make one myself. Essentially my wreath is just a dreamcatcher turned spiderweb. Come to find out, dreamcatchers are really easy to make, so this project can be done in an afternoon (which is good because you only have a week until Halloween!). I used a couple of pins from Pinterest to help me find what I was looking for. I had to look at a few tutorials before I actually figured out the dreamcatcher/web part. While it is really simple, it’s hard to make a tutorial to show the weaving process. Here are a couple of pins to look at: This one isn’t actually in English, but you really just need the photos to get a good grasp on it. In this tutorial from This Fashion is Mine, the loops are done a little different (that’s the one I used). I think it’s a little more secure than the other, but either is a fine choice.


 You need a floral wire wreath to make your dream catcher. They don’t make these any any other color than green (that I’ve noticed), so you’ll have to spray paint it. I ended up making the spiderweb first and spray painting the entire thing. The wreath is essentially an extension of the web, so painting them both makes a more cohesive look.


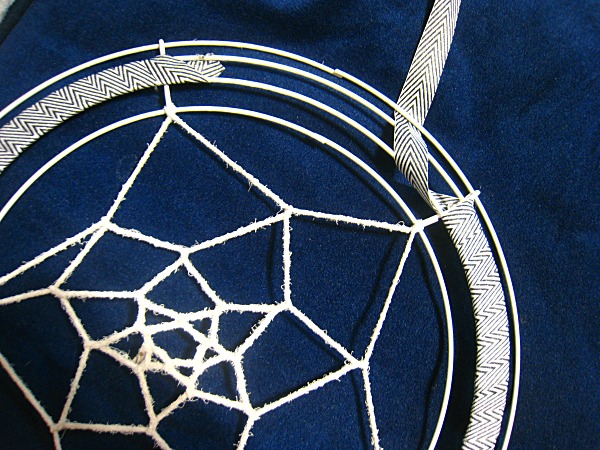
 The next step is applying the ribbon. I used about 3 yards of a ⅝ inch ribbon and overlapped it a little as I wrapped. If you use a thicker ribbon, you might not need to use as much, though I wouldn't recommend going too much thicker because it tends to pucker.
Ribbon wrap.JPG


 For the flowers, I found this tutorial from SNAP! for a sort-of ranunculus type flower and copied a couple of flowers from Kiki&Company’s wreath tutorial (which is absolutely amazing). The wreath tutorial requires a Cricut machine (which I currently don’t have), but it was simple enough to make without it. Just fold a small rectangular strip of paper in half and cut fringe along the folded side. Roll, glue and spread out the pedals to form the flower.


 Once you have your flowers, start gluing (with hot glue. I assumed I wouldn't need to specify, but there's always that person)! It’s a little tricky to glue the flowers to the wire wreath and you’ll end up using a lot of glue, but the ribbon helps to have something to secure it to. Once you've got it glued, add your feathers (or your own embellishments).


 Don’t forget your spider!


Spiderweb wreath (3).JPG


Spiderweb wreath.JPG

Sunday, September 21, 2014

Punch-A-Prize

 Awhile ago we started buying cleaning wipes from Costco. You know, the Clorox or Lysol kind. Well, I began collecting the empty containers thinking there must be something I can use these for. I guess I was using an abnormal amount of wipes cleaning a lot because I they piled up pretty quickly. I had quite the collection when it came time to plan a birthday party. This might be a good time to pause and tell you how I feel about goodie bags. There’s the kind of mom who loves goodie bags. They’re simple, pre-packed (most of the time) and fairly inexpensive. They love to send the attending kids home with a “thank you for coming” gift and I think that’s great. I do too. Then, there’s the kind of mom like me, who loathes goodie bags. The kids come home with these candy-filled bags with cheap toys that they play with for 10 minutes, then leave scattered all over the house. Being the frugal person that I am, I don’t like to throw things away, so there they go, into the toy bins on the bookshelf to waste space. In the end, it’s all about the kids, so I graciously take the goodie bag and ohh and awe over what’s inside as my children pluck each one out of the bag and throw it on the floorboard of my car. I’m not trying to bash the goodie bag mom. I’m just trying to come up with more original prizes the kids can use (or use up) and not be hated by other moms like myself.

 Back to party planning. I didn’t have a pinata and I had tons of these wipes containers (and a severe hatred for goodie bags). That’s when the Punch-A-Prize was born!

 I don’t know whether to call it a game or some sort of prize dispenser. We’ve used it to let the winner of each party game get their prize. I suppose it could be a game in and of itself. It’s like a pinata, in a way. The kids have to do some sort of activity to get the prize out. Perhaps that’s why the love it so much. And love it, they do!

Supplies:
Foam core board
9 empty wipes containers (without lids)
Tissue paper
Scissors
Exacto knife or box cutter
Wrapping paper (optional)
Prizes

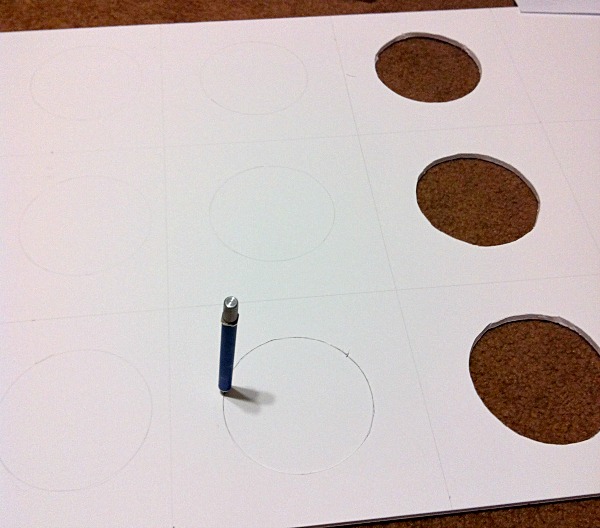
Step 1
Step 1.jpg

 Draw a grid on what will be the backside of the foam core board. You’ll want to end up with a 3x3 grid (you’ll actually end up with a 3x4 because the board isn’t a square). If you’re not a perfectionist, you can just eye-ball this part to save time. Place your containers upside down between each square until they look even. Trace the containers and cut. Note: you want to put the containers upside down because you’ll be punching them through the holes you cut. The bottoms of the containers are smaller, so it won’t work right if you cut the holes from that end.

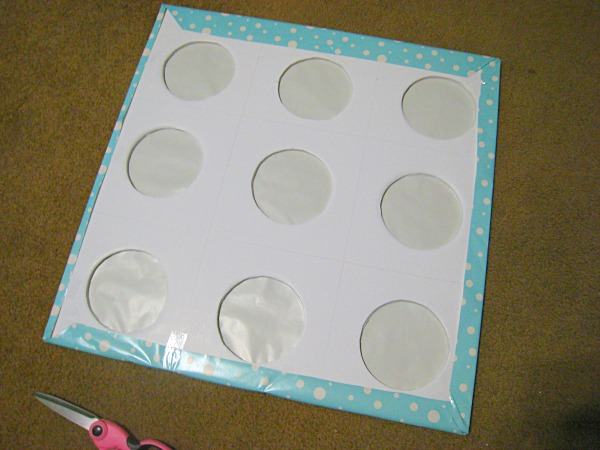
Step 2
Step 2.jpg

 I re-used this board from another party, so at this time, I covered it in wrapping paper and re-cut the holes. If you want, you can do this in step 1 before you cut the original holes.

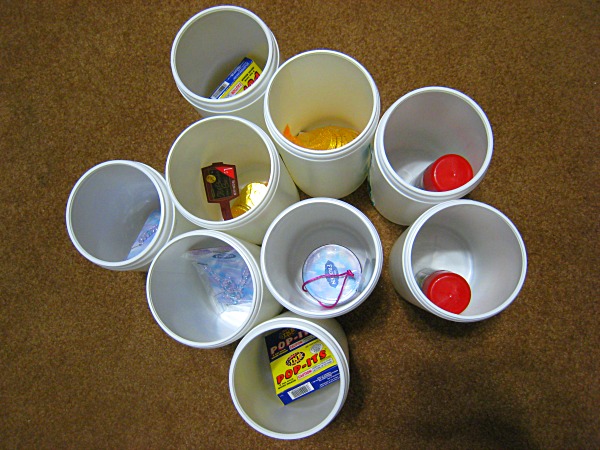
Step 3

Step 3.jpg

 Fill your containers with prizes. I used pretty neutral prizes (silly string, pop-its and chocolate coins), but since this was for my daughter’s party, I had some girly ones stuffed in there too. She still had boys at her party, so  I’ll show you how to deal with it if you have a mix-gendered party.

Step 4
Step 4.jpg

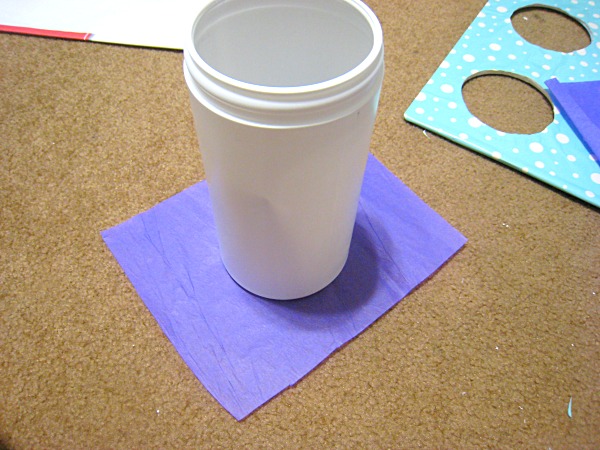
 Cut some tissue paper a little larger than the container opening. Here’s the part, if you have prizes that are geared specifically toward one gender, you can coordinate the color of your tissue paper with the prize inside (i.e.- pink for girl prizes, blue for boys and white for either). Note: you only need one layer of tissue.

Step 5
Step 5.jpg

 Cover the container opening with tissue and punch it through the back of the foam core board. It’s easiest to do this one at a time with the container on a flat surface and the board on top. Be sure to press on the board right next to the container or you risk breaking the board. Once you poke them all through, you’re done! Note: If the tissue is on the thicker side, it may be a little hard for the little ones to punch through. You can solve this problem by poking a tiny hole in the middle with a straight pin. Also, this can be pretty tricky to place, so I used my daughter’s easel frame and it worked perfect!


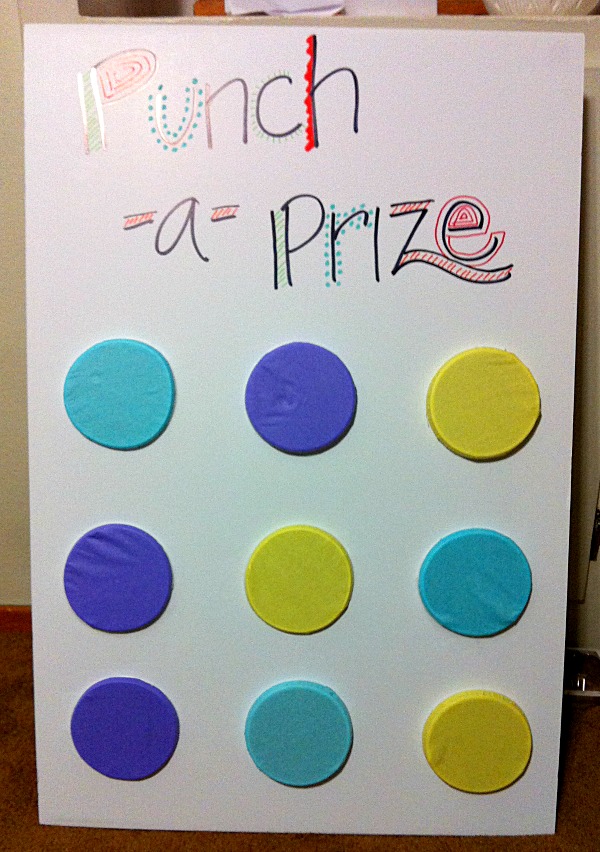
 Since I forgot to snap a pic of the final product, here’s the aftermath. She had a Frozen themed party, so I decorated it with some sparkly snowflakes.

After.jpg

 Here’s another one that I’m embarrassed to show you I didn’t have a lot of time to invest in. I’d love to see your own rendition!

Final.jpg