Showing posts with label easy. Show all posts

Wednesday, October 15, 2014

Breakfast Tacos

Breakfast Tacos @ papermug.blogspot.com.jpg


 My favorite local Mexican restaurant has a dish called Huevos a la Abañil. It’s a scrambled egg dish served with warm tortillas and a side of rice and beans. My mouth is watering just thinking about it. I happened upon this meal when my boyfriend at the time took me to this restaurant for breakfast. I didn't even know they were open for breakfast and wasn't quite sure I wanted to venture out that far. I mean, Mexican food is great for dinner, but to me, seems a little inappropriate heavy for breakfast. I ended up ordering the safest thing on the menu and was completely surprised by it’s deliciousness. Why hadn't I had Mexican food for breakfast before!?


 Since my family moved 5 ½ years ago, its safe to say I don’t get to eat there nearly as often as I’d like. Just recently we started growing jalapeños and I've been getting more creative with my recipes, trying to include them. Then...I discovered I can make something very similar to that breakfast dish! I changed it up a bit to make tacos instead of serving the eggs and tortillas separately. To me, it takes less time to eat which is a bonus.


 Now, bear with me with this recipe. I normally don’t use fat in my cooking besides butter and oil, but I think using reserved bacon or sausage fat adds an additional element of flavor that’s almost necessary. If you don’t have any or are unwilling to use it, I’m sure butter would work just fine. I haven’t tried it, so I can’t say if it will be as tasty.


Ingredients
1 tsp rendered fat
2 eggs
2 corn tortillas
2 small or 1 large jalapeño, julienned
1 slice white onion cut in half
½ roma tomato, julienned
¼ cup Mexican cheese mix
salt to taste


Directions
1. Melt fat in small skillet. Add jalapeño and onion. Saute over medium heat until soft.
2. Whisk eggs in small bowl.
3. Add tomato to eggs and stir. Add salt as desired.
4. When jalapeño and onion are soft, reduce heat to medium-low, add eggs, stirring occasionally.
5. When eggs are finished cooking, divide evenly on warm tortillas.
6. Top with cheese.

Friday, October 3, 2014

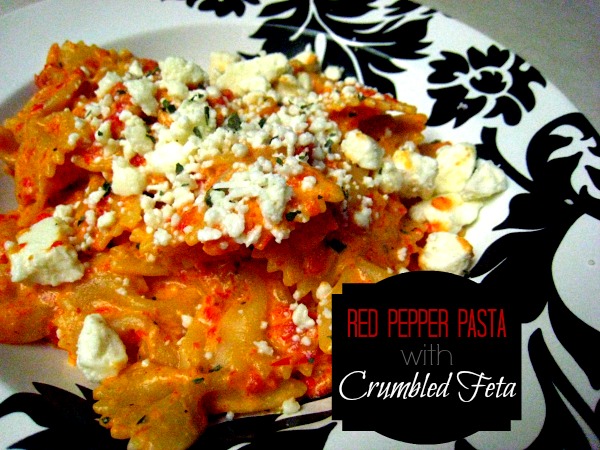
Red Pepper Pasta with Crumbled Feta

Red Pepper Pasta with Crumbled Feta -The Paper Mug.jpg

It’s weird how much I love red bell peppers so much, but loathe the green. They’re from the same plant! One is just on the plant longer than the other, but the result is  a completely different taste. I made up this recipe after eating an amazing pink sauce from a local italian restaurant. Though it’s nothing like that sauce in taste, it does have an alfredo base, which is where the idea stemmed from. This recipe is a favorite among my picky eaters (not to say that yours will love it, but there’s hope) so it has become a regular in our dinner rotation.

The red peppers can be roasted ahead of time to make preparation even easier. I roast, seed and peel mine, then freeze them and dethaw when I’m ready to use. I usually don’t measure my ingredients before making this pasta, so bear with me and adjust according to your preferences. You want to make a strong flavored alfredo sauce so it still has full flavor when blended with the peppers.

Ingredients
16 oz (1 pound) farfalle pasta (I sometimes use whole wheat pasta which adds a hint of nuttiness and another dimension to the flavor)
3 roasted red peppers
2 Tbs butter
4 garlic cloves, minced
1 can evaporated milk
1 cup grated parmesan cheese
½ tsp salt
½ tsp dried basil
pepper to taste
Feta for sprinkling (if you’re not a fan of feta, you can use parmesan or mozzarella, but I highly recommend feta. The flavors compliment each other so well).

Directions
1. Cook pasta according to package directions.
2.  In a separate saucepan, melt butter over medium heat.
3. Add garlic and sauté until fragrant.
4. Pour in evaporated milk and let set until heated through.
5. Once the milk is heated, add parmesan cheese, salt and pepper. Reduce heat and let simmer until thickened.
6. While sauce is thickening, blend roasted red peppers and basil in a blender or food processor.
7. When sauce is done, pour into blender with roasted red peppers and blend again. Return to pan to heat through. Salt again to taste.
8. When pasta is done cooking, drain and mix with sauce. Spoon into serving bowls and sprinkle feta on top.

Friday, September 26, 2014

Jalapeño Crack Dip

Jalapeno Crack Dip.jpg


 Here’s what I know...jalapeños are good. Dip is good. Jalapeño dip is awesome. Let me just tell you how much I love this dip. I could eat the whole bowl myself. I think about this dip the moment my husband pries it from my hands I practice the art of self control and put the remainder of what I haven’t gorged myself on in the fridge until the next morning when it’s a reasonable hour to eat dip (something tells me it’s not appropriate to eat dip for breakfast).
 A few years ago, my hubby and I decided to try growing jalapeños in our garden. If you’ve ever had a garden, you know what it’s like to end up with an over abundance of a particular type of vegetable (zucchini growers say amen) which will leave you scouring the internet for hours to find a recipe for this specific ingredient. I tried jalapeño poppers, which were tasty, but a lot of work. I have two little ones that are 18 months apart. Ain’t nobody got time for that. After modifying and combining a few recipes, I came up with this fabulously addicting dip. I’m sorry. Youre welcome.


Ingredients

1 8oz. block of cream cheese at room temperature (I use reduced fat/neufchatel and it turns out just as tasty)
1 cup shredded cheddar cheese with extra for sprinkling (or cheese blend you prefer)
¼ cup sour cream
½ tsp garlic powder
½ tsp salt
½ cup roasted jalapeños
pepper to taste


Directions

  1. Preheat oven to 350°
  2. In medium bowl, combine cream cheese, garlic powder, salt and sour cream. Beat until smooth.
  3. Add in roasted jalapeños then cheese mixing one at a time.
  4. Scrape into small bowl and sprinkle cheese on top.
  5. Bake at 350° for 15-20 minutes until dip is bubbly and cheese is melted.
  6. Indulge!

Sunday, September 21, 2014

Punch-A-Prize

 Awhile ago we started buying cleaning wipes from Costco. You know, the Clorox or Lysol kind. Well, I began collecting the empty containers thinking there must be something I can use these for. I guess I was using an abnormal amount of wipes cleaning a lot because I they piled up pretty quickly. I had quite the collection when it came time to plan a birthday party. This might be a good time to pause and tell you how I feel about goodie bags. There’s the kind of mom who loves goodie bags. They’re simple, pre-packed (most of the time) and fairly inexpensive. They love to send the attending kids home with a “thank you for coming” gift and I think that’s great. I do too. Then, there’s the kind of mom like me, who loathes goodie bags. The kids come home with these candy-filled bags with cheap toys that they play with for 10 minutes, then leave scattered all over the house. Being the frugal person that I am, I don’t like to throw things away, so there they go, into the toy bins on the bookshelf to waste space. In the end, it’s all about the kids, so I graciously take the goodie bag and ohh and awe over what’s inside as my children pluck each one out of the bag and throw it on the floorboard of my car. I’m not trying to bash the goodie bag mom. I’m just trying to come up with more original prizes the kids can use (or use up) and not be hated by other moms like myself.

 Back to party planning. I didn’t have a pinata and I had tons of these wipes containers (and a severe hatred for goodie bags). That’s when the Punch-A-Prize was born!

 I don’t know whether to call it a game or some sort of prize dispenser. We’ve used it to let the winner of each party game get their prize. I suppose it could be a game in and of itself. It’s like a pinata, in a way. The kids have to do some sort of activity to get the prize out. Perhaps that’s why the love it so much. And love it, they do!

Supplies:
Foam core board
9 empty wipes containers (without lids)
Tissue paper
Scissors
Exacto knife or box cutter
Wrapping paper (optional)
Prizes

Step 1
Step 1.jpg

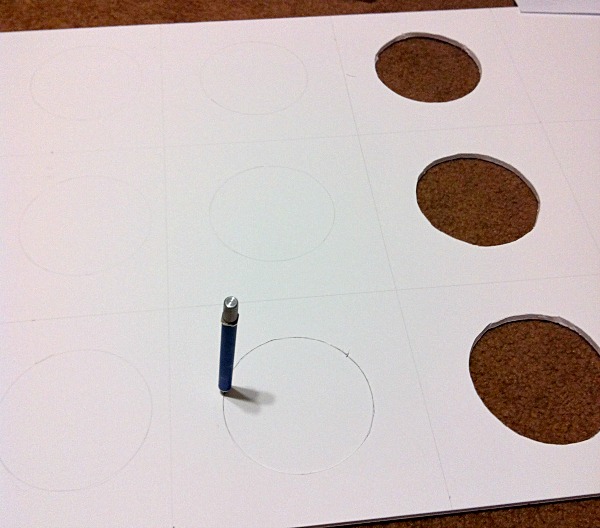
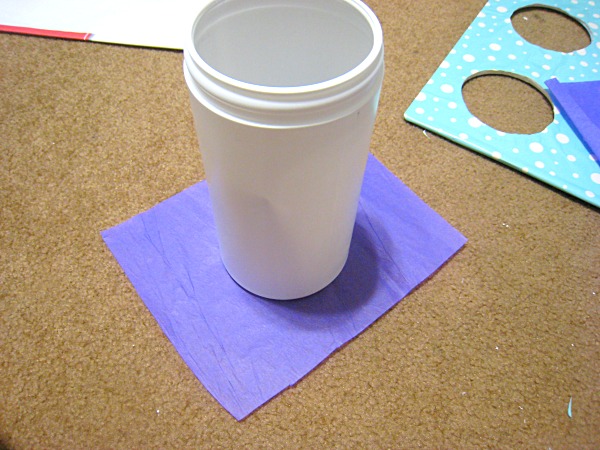
 Draw a grid on what will be the backside of the foam core board. You’ll want to end up with a 3x3 grid (you’ll actually end up with a 3x4 because the board isn’t a square). If you’re not a perfectionist, you can just eye-ball this part to save time. Place your containers upside down between each square until they look even. Trace the containers and cut. Note: you want to put the containers upside down because you’ll be punching them through the holes you cut. The bottoms of the containers are smaller, so it won’t work right if you cut the holes from that end.

Step 2
Step 2.jpg

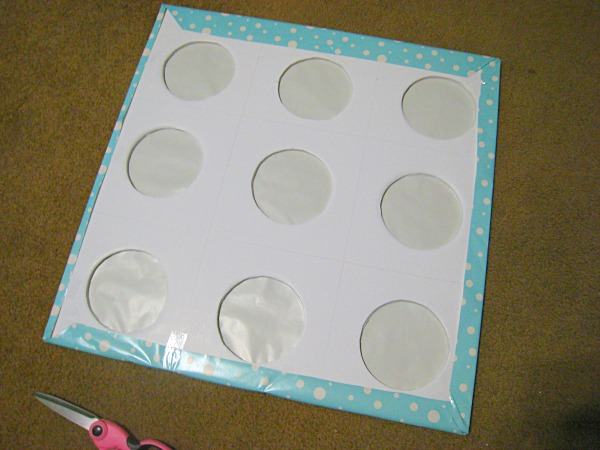
 I re-used this board from another party, so at this time, I covered it in wrapping paper and re-cut the holes. If you want, you can do this in step 1 before you cut the original holes.

Step 3

Step 3.jpg

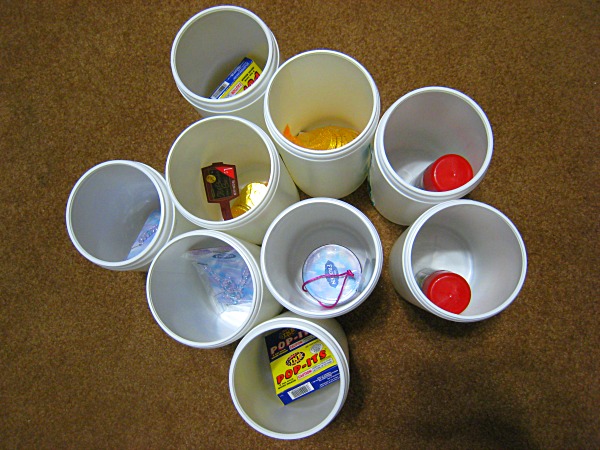
 Fill your containers with prizes. I used pretty neutral prizes (silly string, pop-its and chocolate coins), but since this was for my daughter’s party, I had some girly ones stuffed in there too. She still had boys at her party, so  I’ll show you how to deal with it if you have a mix-gendered party.

Step 4
Step 4.jpg

 Cut some tissue paper a little larger than the container opening. Here’s the part, if you have prizes that are geared specifically toward one gender, you can coordinate the color of your tissue paper with the prize inside (i.e.- pink for girl prizes, blue for boys and white for either). Note: you only need one layer of tissue.

Step 5
Step 5.jpg

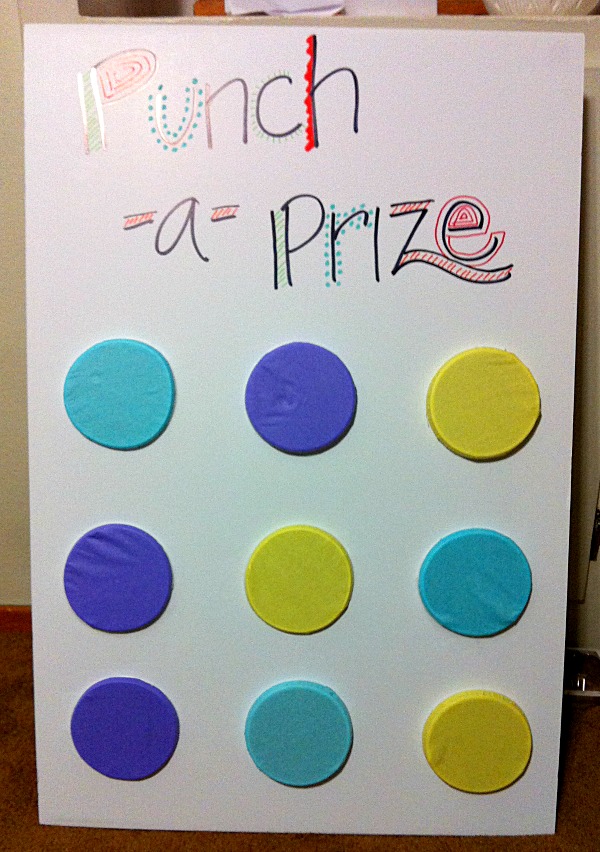
 Cover the container opening with tissue and punch it through the back of the foam core board. It’s easiest to do this one at a time with the container on a flat surface and the board on top. Be sure to press on the board right next to the container or you risk breaking the board. Once you poke them all through, you’re done! Note: If the tissue is on the thicker side, it may be a little hard for the little ones to punch through. You can solve this problem by poking a tiny hole in the middle with a straight pin. Also, this can be pretty tricky to place, so I used my daughter’s easel frame and it worked perfect!


 Since I forgot to snap a pic of the final product, here’s the aftermath. She had a Frozen themed party, so I decorated it with some sparkly snowflakes.

After.jpg

 Here’s another one that I’m embarrassed to show you I didn’t have a lot of time to invest in. I’d love to see your own rendition!

Final.jpg

Thursday, September 11, 2014

Honey Mustard Mayo

Do you struggle with what to feed party guests as much as I do? Pizza is such a popular party food, but not always the healthiest choice. I was faced with this dilemma and decided to get sandwiches from Costco. Boy, am I glad I did. They come on lovely croissants and are pre-cut, so the kiddos can have half and they adults can grab more if they want. The thing that I really loved about their platter is that it came with two small containers of spreads you can put on your sandwich. One was a chipotle-type spread and the other, a honey mustard mayonnaise. I tell you, once it dawned on me that I can make the honey mustard mayo myself, I haven’t put anything else on my sandwiches since then! It’s the easiest, quickest tastiest condiment I’ve made. Sure, you can go to the store and pick up a bottle, but you can’t really customize that to your taste buds and you can make your own with real mustard, real honey and real mayonnaise. I suppose you could try and make your own mayo if you want, but I just don’t have that kind of faith in myself time. I put this stuff on every sandwich, but you could probably get really creative and try it on baked chicken or something. You only need three ingredients:

Honey-mustard mayo.JPG

Ingredients
½ cup Mayonnaise (light, if you prefer)
1 Tbs Spicy Brown Mustard
1 Tbs Honey


Directions
1. Let’s face the facts, you don’t really need directions for this, but if you do, proceed to #2
2. Mix all ingredients together in a small bowl. Adjust mustard and honey according to your preference. Store in the refrigerator.

Enjoy!