Showing posts with label decorations. Show all posts

Sunday, November 23, 2014

Thankful For...Gold Flatware

 Here it is. The Holidays. Thanksgiving, Christmas and New Year’s. Are we throwing Halloween in there now? Like most people I know, my hubby and I have to decide between going to my family’s get together or his. Up until recently, he has had to work on holidays, so I’m usually left to do my own thing, (but that’s beside the point). For the past 9 years or so, my aunt has held the baton for the Thanksgiving bash. She has a great house for entertaining. Open floor plan, new construction, high ceiling, fireplace, something I can’t afford...you know the type. Anyway, the one thing you can count on her pulling out for this special occasion is her gold flatware. My first experience with gold flatware was at her house on this very holiday. My emotions were multifarious (nice word, huh? I used a thesaurus). Being someone who loves things that are out of the ordinary, I was drawn to this flatware, but being someone who likes tradition (who am I?), I scoffed quietly at the display. At this point in my life I hated all things gold. I never wore gold jewelry and I most certainly wouldn’t have gold flatware. Since then, my feelings about gold have changed, but that could be a whole different post.


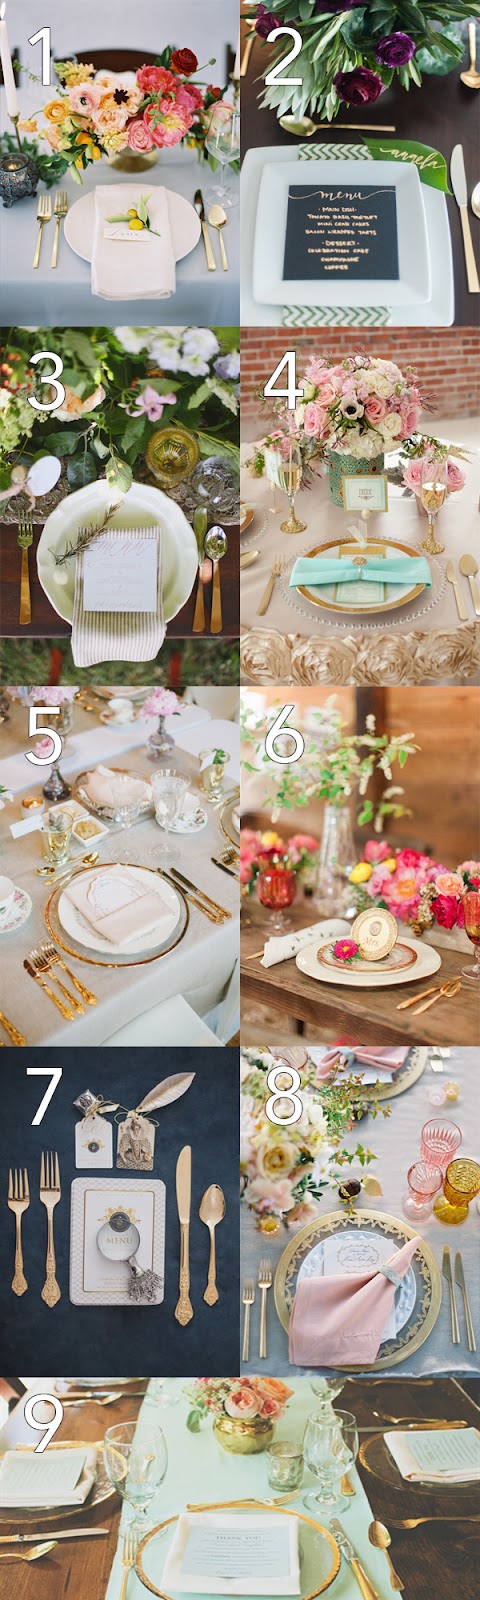
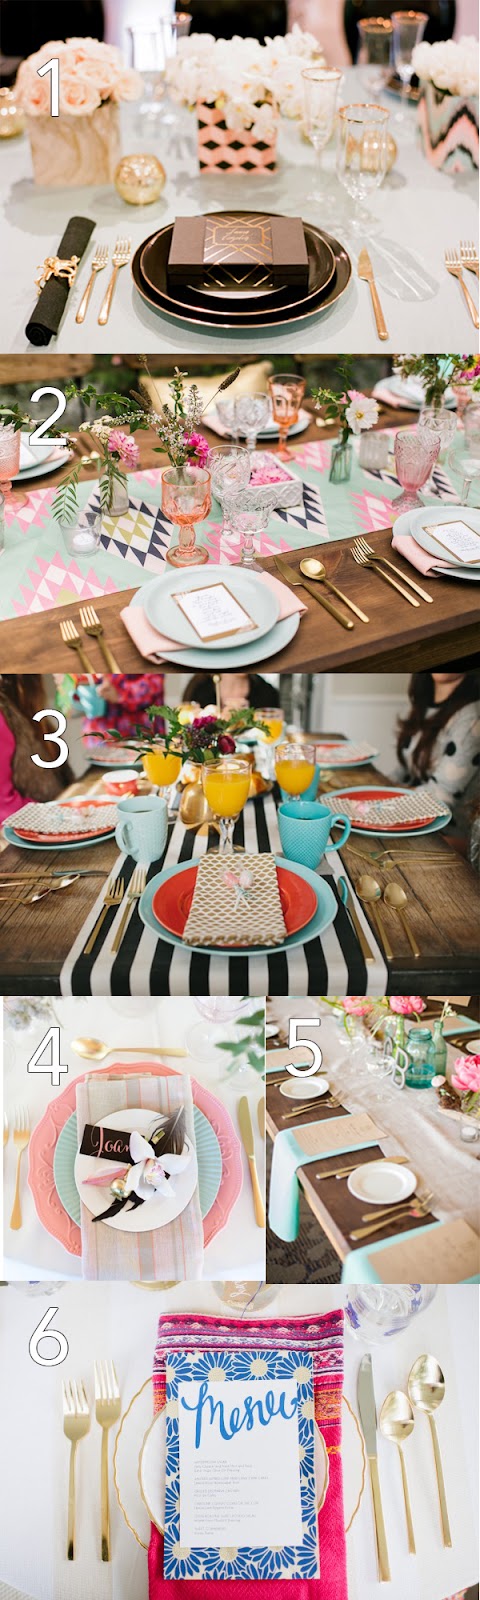
 Thinking about that gold flatware and what she is going to do with the table scape, I’m excited for it to make it’s annual appearance. There are so many lovely things you could do with this flatware. Think of the possibilities! Actually, stop thinking, I’ll show you. I’ve scoured various pins on Pinterest and compiled a lovely collage of ideas for your enjoyment.


Flatware collage black and white-4.jpg


Black and White


Gold flatware natural.jpg


Natural


Gold flatware tea time.jpg


Tea Time


Gold flatware modern.jpg


Mod

Saturday, September 27, 2014

Before and After: Jessica's Bathroom


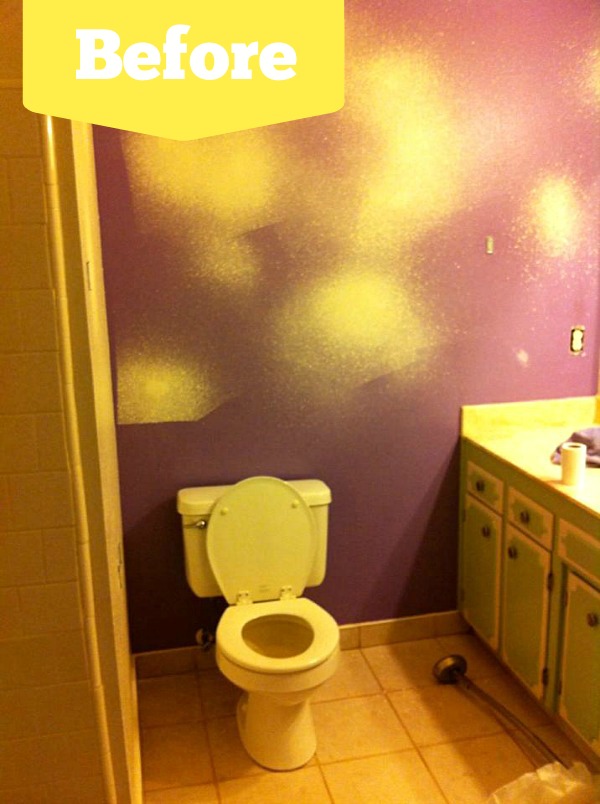
Jessica's Bathroom before (text).jpg

 My friend Jessica is a mommy to 4 children and an amazing photographer. I’m not sure where she found the time to do her mini bathroom remodel , but she’s a crafty girl with an eye for a bargain and good design, so where there’s a will, there’s a way. Would you believe this whole bathroom remodel cost her a mere $83.50?! See the breakdown in what Jessica had to say:  

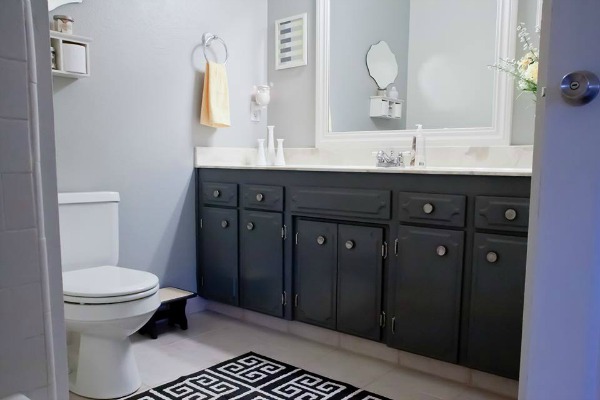
All the walls and ceiling were painted. The wall behind the toilet and mirror are a light shade of grey, the rest of the walls & ceiling are white ($2.50 for oops paint & leftover white from other rooms). Cabinets were painted a dark grey ($17). Mirror was cut down and framed ($5 to cut, $30 for framing). Repurposed flowers and new yellow ones ($2) and I got new hand towels ($2.50 for 2 at Target this week). I made the little framed art next to the mirror with free paint chips and frames I already had ($0)! New rug from Costco ($13). Mirror above toilet from Goodwill in Turlock, it was brand new in the packaging still ($7.50). Scrubbed the tile & grout today with some heavy strength grout cleaner we already had... it looks brand new! I have one last little project... I bought a large canvas from the thrift store for $4 (someone had started a painting but didn't finish it) that will have a quote of some sort stenciled on it. I'm very proud of how it all turned out... if only it would stay this pretty and clean... I'm sure the kids will have it smelling like a boy’s bathroom soon!

And here is the refreshing after…
Jessica's Bathroom-5.jpg

Jessica's Bathroom-4.jpg
Jessica's Bathroom-6.jpg

Sunday, September 21, 2014

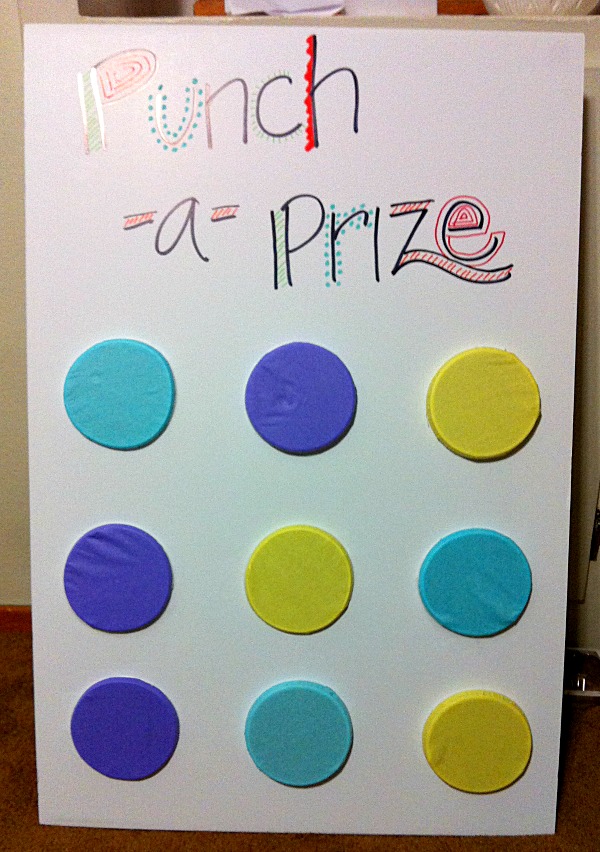
Punch-A-Prize

 Awhile ago we started buying cleaning wipes from Costco. You know, the Clorox or Lysol kind. Well, I began collecting the empty containers thinking there must be something I can use these for. I guess I was using an abnormal amount of wipes cleaning a lot because I they piled up pretty quickly. I had quite the collection when it came time to plan a birthday party. This might be a good time to pause and tell you how I feel about goodie bags. There’s the kind of mom who loves goodie bags. They’re simple, pre-packed (most of the time) and fairly inexpensive. They love to send the attending kids home with a “thank you for coming” gift and I think that’s great. I do too. Then, there’s the kind of mom like me, who loathes goodie bags. The kids come home with these candy-filled bags with cheap toys that they play with for 10 minutes, then leave scattered all over the house. Being the frugal person that I am, I don’t like to throw things away, so there they go, into the toy bins on the bookshelf to waste space. In the end, it’s all about the kids, so I graciously take the goodie bag and ohh and awe over what’s inside as my children pluck each one out of the bag and throw it on the floorboard of my car. I’m not trying to bash the goodie bag mom. I’m just trying to come up with more original prizes the kids can use (or use up) and not be hated by other moms like myself.

 Back to party planning. I didn’t have a pinata and I had tons of these wipes containers (and a severe hatred for goodie bags). That’s when the Punch-A-Prize was born!

 I don’t know whether to call it a game or some sort of prize dispenser. We’ve used it to let the winner of each party game get their prize. I suppose it could be a game in and of itself. It’s like a pinata, in a way. The kids have to do some sort of activity to get the prize out. Perhaps that’s why the love it so much. And love it, they do!

Supplies:
Foam core board
9 empty wipes containers (without lids)
Tissue paper
Scissors
Exacto knife or box cutter
Wrapping paper (optional)
Prizes

Step 1
Step 1.jpg

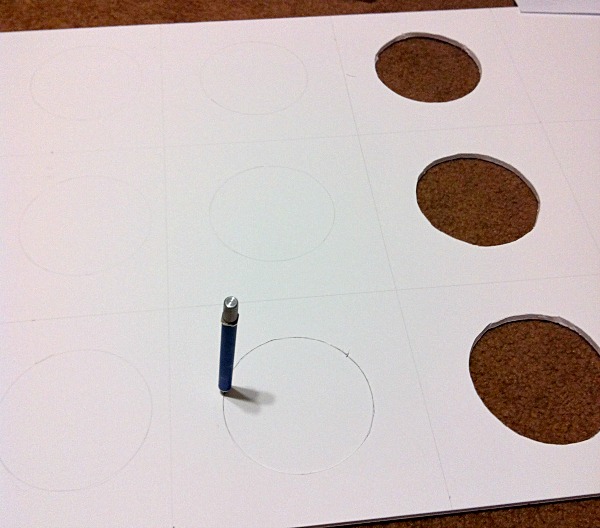
 Draw a grid on what will be the backside of the foam core board. You’ll want to end up with a 3x3 grid (you’ll actually end up with a 3x4 because the board isn’t a square). If you’re not a perfectionist, you can just eye-ball this part to save time. Place your containers upside down between each square until they look even. Trace the containers and cut. Note: you want to put the containers upside down because you’ll be punching them through the holes you cut. The bottoms of the containers are smaller, so it won’t work right if you cut the holes from that end.

Step 2
Step 2.jpg

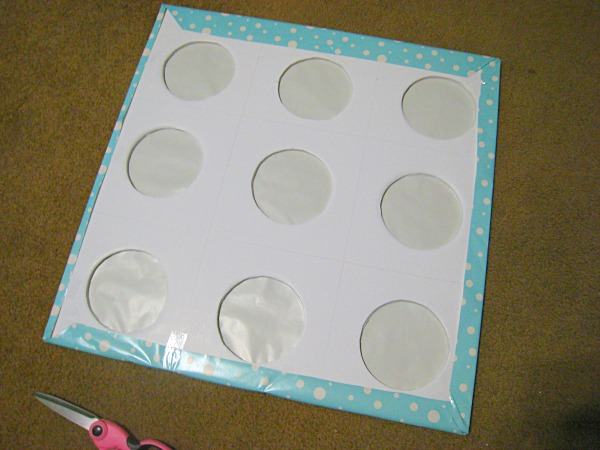
 I re-used this board from another party, so at this time, I covered it in wrapping paper and re-cut the holes. If you want, you can do this in step 1 before you cut the original holes.

Step 3

Step 3.jpg

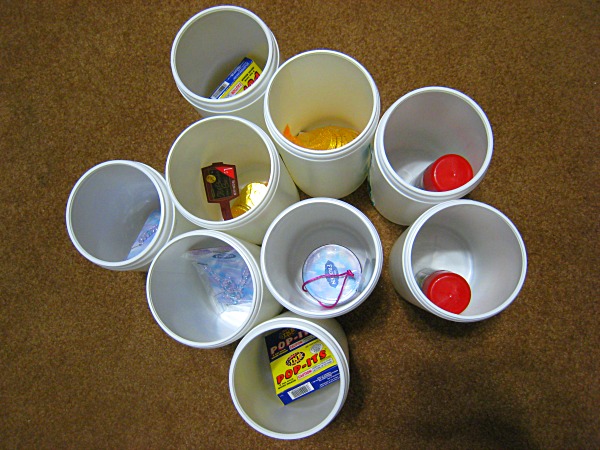
 Fill your containers with prizes. I used pretty neutral prizes (silly string, pop-its and chocolate coins), but since this was for my daughter’s party, I had some girly ones stuffed in there too. She still had boys at her party, so  I’ll show you how to deal with it if you have a mix-gendered party.

Step 4
Step 4.jpg

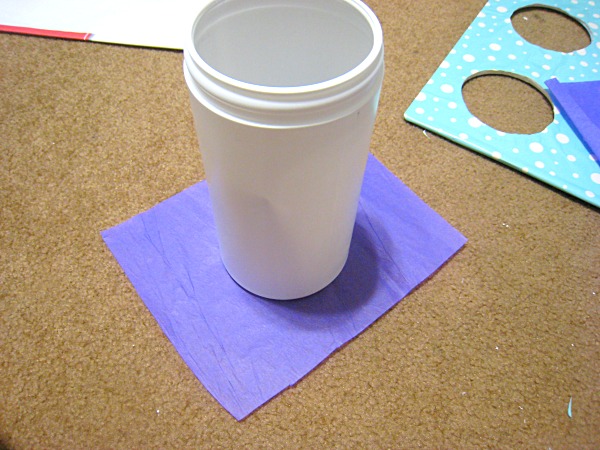
 Cut some tissue paper a little larger than the container opening. Here’s the part, if you have prizes that are geared specifically toward one gender, you can coordinate the color of your tissue paper with the prize inside (i.e.- pink for girl prizes, blue for boys and white for either). Note: you only need one layer of tissue.

Step 5
Step 5.jpg

 Cover the container opening with tissue and punch it through the back of the foam core board. It’s easiest to do this one at a time with the container on a flat surface and the board on top. Be sure to press on the board right next to the container or you risk breaking the board. Once you poke them all through, you’re done! Note: If the tissue is on the thicker side, it may be a little hard for the little ones to punch through. You can solve this problem by poking a tiny hole in the middle with a straight pin. Also, this can be pretty tricky to place, so I used my daughter’s easel frame and it worked perfect!


 Since I forgot to snap a pic of the final product, here’s the aftermath. She had a Frozen themed party, so I decorated it with some sparkly snowflakes.

After.jpg

 Here’s another one that I’m embarrassed to show you I didn’t have a lot of time to invest in. I’d love to see your own rendition!

Final.jpg

Friday, September 19, 2014

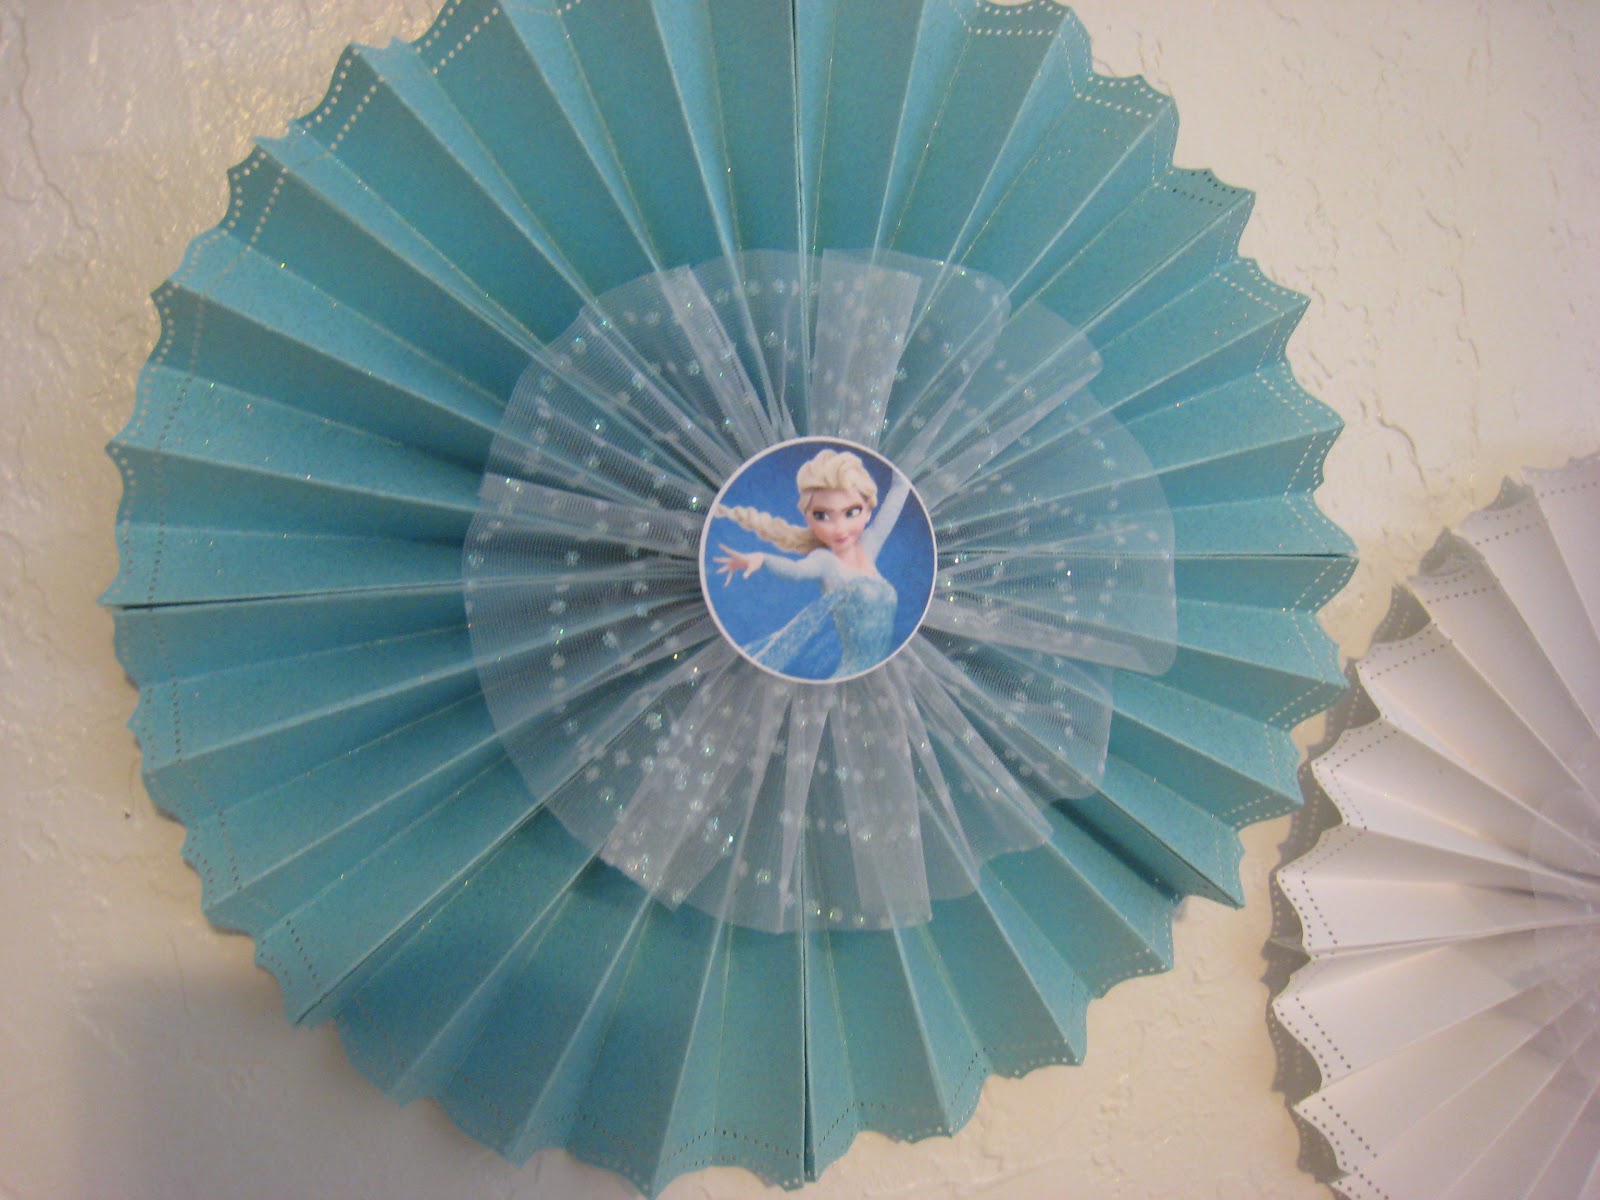
Disney's Frozen Paper Medallion Tutorial

 IMG_6686.JPG
 
 I live in a town without a party store. Yep, that’s right. If we want party supplies we’re left to the big box stores like Walmart and Target which can leave us a little short-changed if we’re looking for something specific, or we need to go to the nearest (bigger) town with one which is about 30 minutes away. Even then, a party store might not have exactly what I’m looking for and I usually procrastinate to the point where it’s too late to order online.  I’m also one of those people who doesn’t like a really bold theme with characters plastered on every party supply and decoration.
 These are the reasons I’ve resorted to making most of my own decorations. I feel like I can make something that costs less and looks a whole lot better.
 One of the things I’ve made for a couple of my daughter’s parties have been the paper medallion. Yes, there are already several tutorials on the subject, but I’m not going to reference any of those because I feel like I’m original  I made these on my own before I saw any tutorials. I’ve taken lots of pictures to hopefully help you out, but bear with me because my camera sucks I need a new camera.


Here are the supplies you need:
4  8 ½ x11 sheets of paper or 3 12x12 per medallion
Glue gun
Ruler
Scissors, paper cutter or Exacto knife
Cupcake toppers or something else to put in the middle
Tulle or other embellishment


Helpful, but not necessary supplies:
Bone folder
Paper edge punch or decorative scissors


Step 1
Step 1.jpg


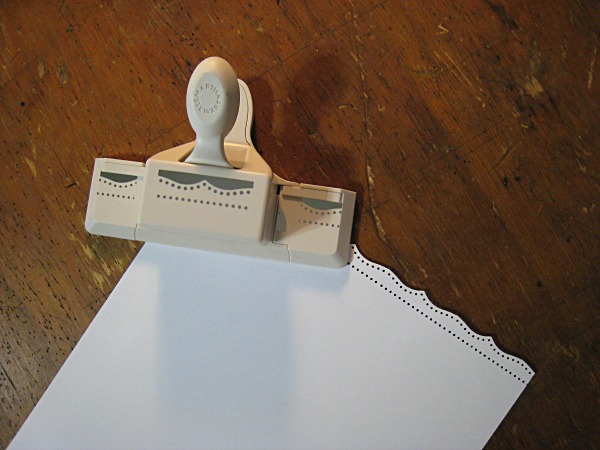
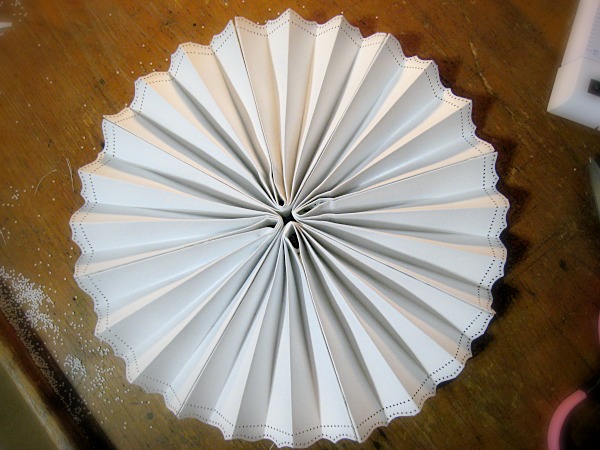
 If you’d like a decorative edge on your medallions do that first. I used a simple Martha Stewart paper edge punch, but you can use some decorative scissors too. Just be sure to keep your edges straight, of you won’t have a perfectly round circle. I loved this on the plain white paper, because when it’s all done, it looks like a snowflake! Some sparkly paper would be even better!


Step 2
Step 2.jpg


 Cut ½ inch off the width of your paper if you’re using a standard 8 ½ x11. Because you’re going to be folding these in 1 inch folds, that ½ inch just doesn’t work. If you’re using a 12x12, this step isn’t necessary.


Step 3
Step 3.jpg


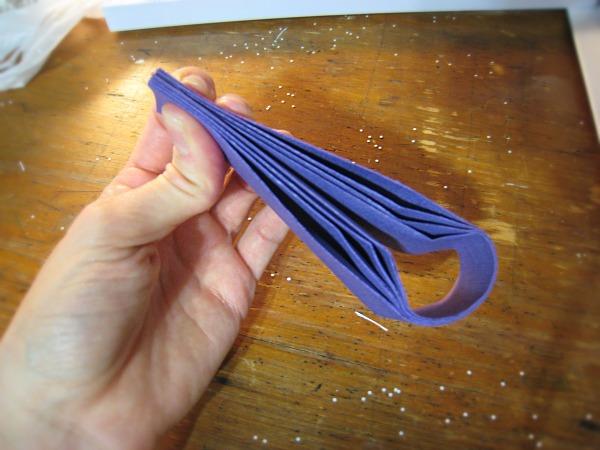
 Using your bone folder (or if you don’t have one, a ruler), make a fold every inch down the length of your paper, then fold your paper accordion style. Note: there’s no need to try and flip the paper and make offset folds on both sides. The folds will bend forward and backward and you’ll save tons of time by just doing them all on one side of your paper.
 When folding, be sure to keep your paper as straight as possible and try to keep the spacing between the folds as even as possible.


Step 3 (2).jpg


 Sometimes you’ll end up with one edge that’s folded “up” and one edge down, like the picture above (especially if you accidentally forget to cut that ½ inch off in step 1). Preferably, you would have both edges facing down, forming a sort of “M” shape, but you can work with it if it does this. You’ll see why once you start gluing it together.
Step 4
Step 4.jpg
 
 Fold your paper in half, making sure the inside edges are down and the tops are even. If you wind up with the ends of your folds going opposite directions (like the picture in step 3), make sure in this step that the edge pointing “up” goes on the outside when you fold your paper in half, and don’t glue two “up ends” together (in step 5).


Step 5
Step 5.jpg


 Once you have all your papers folded and ready, start gluing the inside edges on each individual sheet, then glue each paper to the next. You’ll want the folded peaks to be seen on the upside and the raw open ends on the underside. Make sure the tops of the folds are nice and even when gluing. If you find you have one end that’s longer or shorter than the other side, simply make sure that one is hidden in the back of the medallion. As long as you glue the top edges of the folds straight, it will look just fine. Once it’s all glued, it should end up looking like this:

Step 5 (2).jpg


Step 6
You can leave your medallion looking all funky in the middle like this, or finish it off with some embellishments in the middle. I used tulle, plastic snowflakes from Hobby Lobby and some Frozen themed cupcake toppers found on Great Kids Birthday Parties blog. I have a two inch punch, so those were perfect, but if you want to go a little bigger, these toppers found SKGaleana would look amazing. Print on cardstock.

Step 6.jpg


 For the tulle, cut appx 15 inches from a roll, accordion fold lengthwise (just gather it up with your fingers, this doesn’t have to be perfect), then pinch and tie in the middle. When the tulle unfolds, it will create its own little medallion. Hot glue to the middle of your paper medallion. Then, glue one of the cupcake toppers you printed out earlier on top of the tulle (or snowflake, or whatever you desire). Voila!


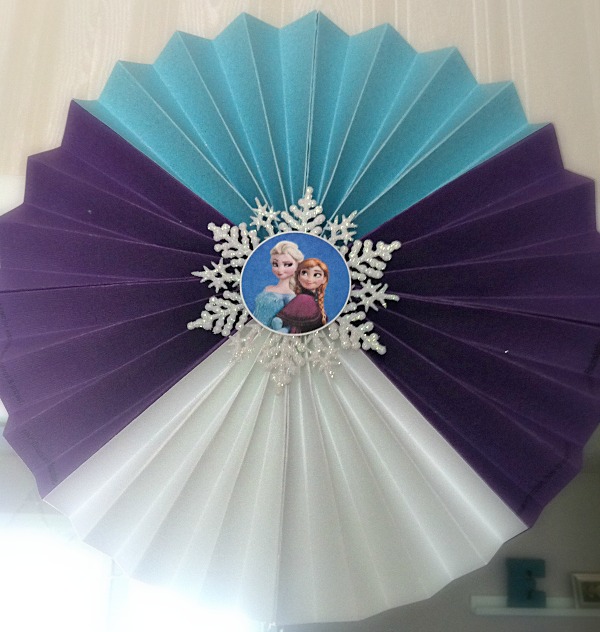
 Yes, there are a  LOT of instructions. It all seems very technical until you actually do it and understand the steps. You’ll be pumping them out in no time! Here are some more pictures of the ones I used for my daughter’s Frozen party. Enjoy!


Paper Medallion.jpg
Ana.jpg


Again, I apologize for the crappy photography out-of-date camera

Sisters.jpg

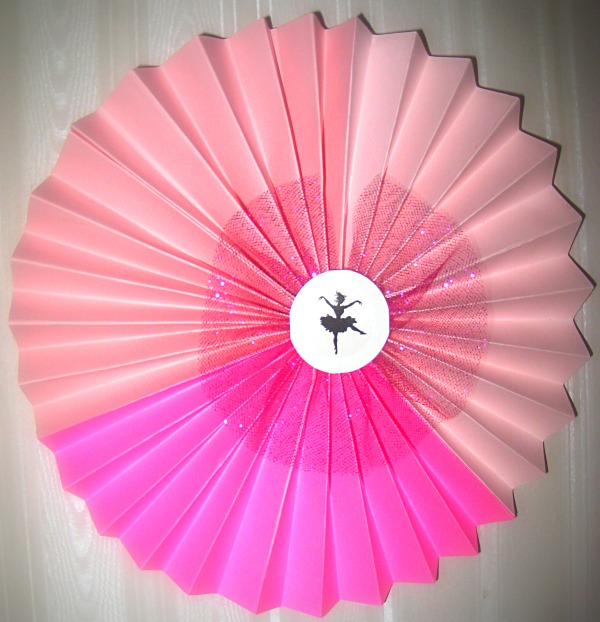
Finally...here’s a pic from my daughter’s ballet themed party that I used 3 12x12 inch papers. I like using the 12x12 better, but that’s just my preference.

ballet medallion.jpg