Showing posts with label paper. Show all posts

Saturday, January 3, 2015

Free Printable- Make Your Own Adventure

Make Your Own Adventure.jpg 
 Ah, the new year. A time that holds so much hope...then so much failure. A time when so many people are hopeful that if they make a resolution to be happier, healthier, more organized or successful, they’ll magically wake up the next day and everything will be changed. This is their year (never mind when they fell off the bandwagon two weeks into last year).  Don’t get me wrong, I think resolutions are great. I think self-reflection is one of the most important things we can do. But...have you known anyone to successfully fulfil their resolutions the entire year? Once, I actually made a resolution to not make a resolution so I could actually fulfill it (I think I failed at that one too). See, I’m not hating on anyone, I fall into the same category. Still, as silly as I think it is to make a resolution just to break it, my optimistic side wins and I can’t help but mentally list all the things I’d like to better about myself (I’m not one to actually write them down on paper. They’re much easier to modify if you don’t do that). Haha!


 All that nonsense being said and the fact that my husband watches a lot of TV leads me to the free printable I’m sharing with you today. Wait, what? Yeah, you read that right. Two seemingly random thoughts, but stay with me and I’ll try and build the bridge for you.


 My husband has a relatively stressful job. He is a correctional officer, so he basically has to babysit adults and play mind games all day. That’s not the focus here, but his way of relieving stress and unplugging after a long day is to watch TV. I got to thinking about what it is about TV and movies that is so appealing to so many people. Essentially, we are just watching someone else live a better life than we are. And there it is. If we just got up off the couch and made our own adventure, we would be far more fulfilled, active and interesting than if we just sat and watched someone else’s adventure. And then they would be making movies about us...or maybe just making YouTube videos.


 So...is this your year? Is this the year you’re actually going to join that bowling league, sing more karaoke or yarn-bomb that tree outside your frequented coffee shop? Go do it! Get up and go make your own adventure!

Click here to print

Thursday, November 27, 2014

Free Printable- LOVE

  For the past month or so, my pastor has been speaking about what, "Love Does," and encouraging us to memorize 1 Corinthians 13. No, that's not a typo. He's encouraging us to read the WHOLE chapter. This is something that seems way beyond my capabilities (I'm pretty sure I have the mental capacity of a 70 year old woman when it comes to memorizing). However, I've managed to retain some of the beginning verses. I think I'm through verse 6 now? See, I can't even remember what verse I'm on.  I digress. That all being said, this printable (along with every traditional wedding vow ever written) is inspired by that chapter. Feel free to print at will, but please do not reproduce for profit. Enjoy!


Wednesday, October 22, 2014

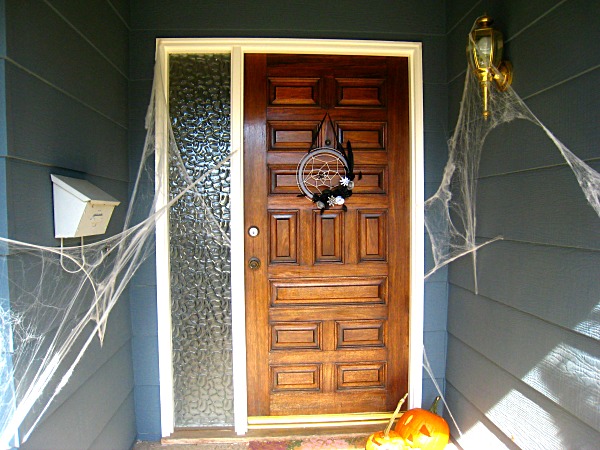
Halloween Spiderweb Wreath

Spiderweb wreath (2).JPG


 Ever hear of the word “Procraftination?” Well, the fact that I’m posting my Halloween wreath a week before Halloween is a prime example. I’m WAAAY behind in the craft world. In blogland, this should have been done a month ago. Like that wise person once said, “Better late than never!”


 I seriously thought about saving this post for a whole year and actually having it prepared for next Halloween, but I just couldn’t wait to share it’s cuteness.


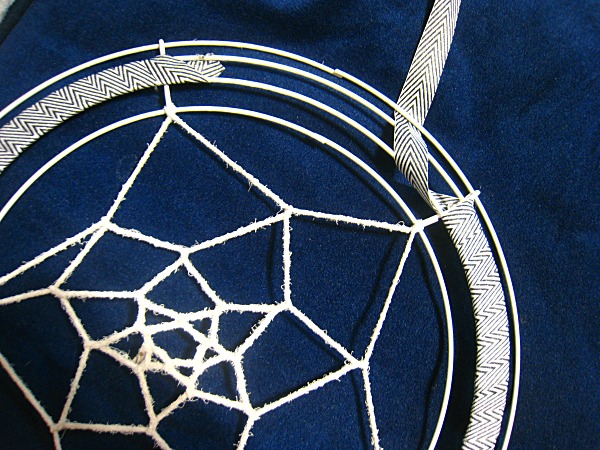
 Have you noticed how popular wreaths are becoming among crafters? Maybe they’ve always been that popular and I’m just now noticing? I thought maybe I better take the plunge and make one myself. Essentially my wreath is just a dreamcatcher turned spiderweb. Come to find out, dreamcatchers are really easy to make, so this project can be done in an afternoon (which is good because you only have a week until Halloween!). I used a couple of pins from Pinterest to help me find what I was looking for. I had to look at a few tutorials before I actually figured out the dreamcatcher/web part. While it is really simple, it’s hard to make a tutorial to show the weaving process. Here are a couple of pins to look at: This one isn’t actually in English, but you really just need the photos to get a good grasp on it. In this tutorial from This Fashion is Mine, the loops are done a little different (that’s the one I used). I think it’s a little more secure than the other, but either is a fine choice.


 You need a floral wire wreath to make your dream catcher. They don’t make these any any other color than green (that I’ve noticed), so you’ll have to spray paint it. I ended up making the spiderweb first and spray painting the entire thing. The wreath is essentially an extension of the web, so painting them both makes a more cohesive look.


 The next step is applying the ribbon. I used about 3 yards of a ⅝ inch ribbon and overlapped it a little as I wrapped. If you use a thicker ribbon, you might not need to use as much, though I wouldn't recommend going too much thicker because it tends to pucker.

Ribbon wrap.JPG


 For the flowers, I found this tutorial from SNAP! for a sort-of ranunculus type flower and copied a couple of flowers from Kiki&Company’s wreath tutorial (which is absolutely amazing). The wreath tutorial requires a Cricut machine (which I currently don’t have), but it was simple enough to make without it. Just fold a small rectangular strip of paper in half and cut fringe along the folded side. Roll, glue and spread out the pedals to form the flower.


 Once you have your flowers, start gluing (with hot glue. I assumed I wouldn't need to specify, but there's always that person)! It’s a little tricky to glue the flowers to the wire wreath and you’ll end up using a lot of glue, but the ribbon helps to have something to secure it to. Once you've got it glued, add your feathers (or your own embellishments).


 Don’t forget your spider!


Spiderweb wreath (3).JPG


Spiderweb wreath.JPG

Friday, September 19, 2014

Disney's Frozen Paper Medallion Tutorial

 IMG_6686.JPG
 
 I live in a town without a party store. Yep, that’s right. If we want party supplies we’re left to the big box stores like Walmart and Target which can leave us a little short-changed if we’re looking for something specific, or we need to go to the nearest (bigger) town with one which is about 30 minutes away. Even then, a party store might not have exactly what I’m looking for and I usually procrastinate to the point where it’s too late to order online.  I’m also one of those people who doesn’t like a really bold theme with characters plastered on every party supply and decoration.
 These are the reasons I’ve resorted to making most of my own decorations. I feel like I can make something that costs less and looks a whole lot better.
 One of the things I’ve made for a couple of my daughter’s parties have been the paper medallion. Yes, there are already several tutorials on the subject, but I’m not going to reference any of those because I feel like I’m original  I made these on my own before I saw any tutorials. I’ve taken lots of pictures to hopefully help you out, but bear with me because my camera sucks I need a new camera.


Here are the supplies you need:
4  8 ½ x11 sheets of paper or 3 12x12 per medallion
Glue gun
Ruler
Scissors, paper cutter or Exacto knife
Cupcake toppers or something else to put in the middle
Tulle or other embellishment


Helpful, but not necessary supplies:
Bone folder
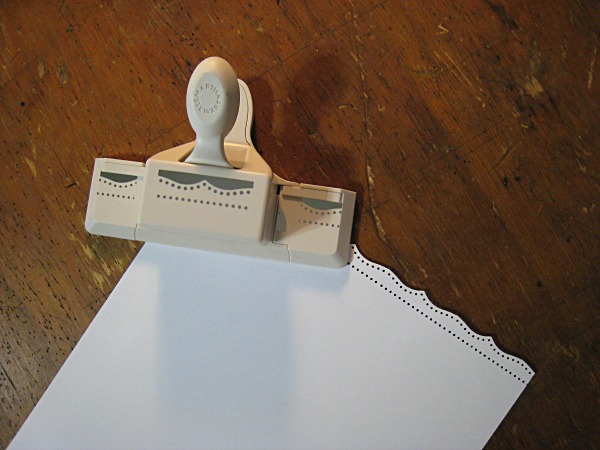
Paper edge punch or decorative scissors


Step 1
Step 1.jpg


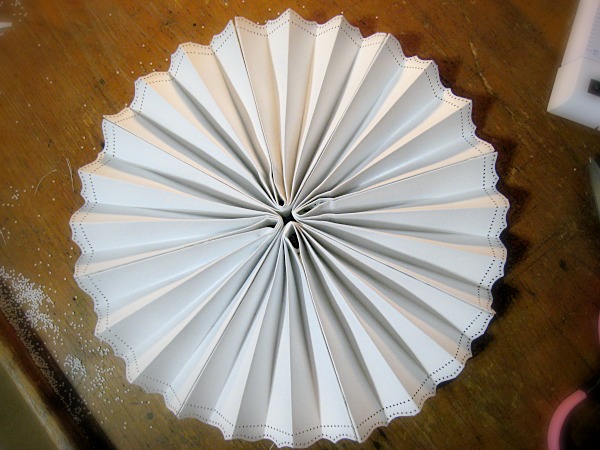
 If you’d like a decorative edge on your medallions do that first. I used a simple Martha Stewart paper edge punch, but you can use some decorative scissors too. Just be sure to keep your edges straight, of you won’t have a perfectly round circle. I loved this on the plain white paper, because when it’s all done, it looks like a snowflake! Some sparkly paper would be even better!


Step 2
Step 2.jpg


 Cut ½ inch off the width of your paper if you’re using a standard 8 ½ x11. Because you’re going to be folding these in 1 inch folds, that ½ inch just doesn’t work. If you’re using a 12x12, this step isn’t necessary.


Step 3
Step 3.jpg


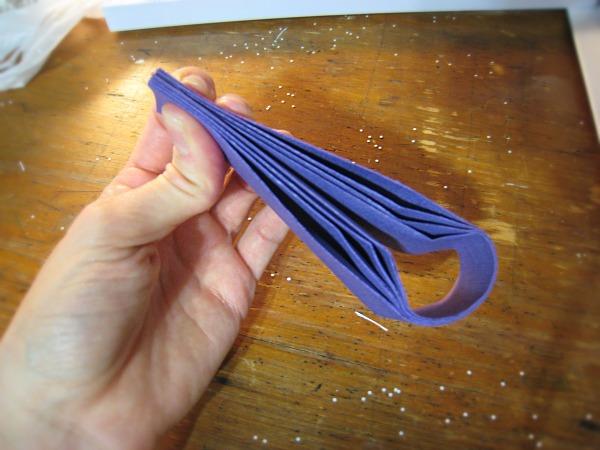
 Using your bone folder (or if you don’t have one, a ruler), make a fold every inch down the length of your paper, then fold your paper accordion style. Note: there’s no need to try and flip the paper and make offset folds on both sides. The folds will bend forward and backward and you’ll save tons of time by just doing them all on one side of your paper.
 When folding, be sure to keep your paper as straight as possible and try to keep the spacing between the folds as even as possible.


Step 3 (2).jpg


 Sometimes you’ll end up with one edge that’s folded “up” and one edge down, like the picture above (especially if you accidentally forget to cut that ½ inch off in step 1). Preferably, you would have both edges facing down, forming a sort of “M” shape, but you can work with it if it does this. You’ll see why once you start gluing it together.
Step 4
Step 4.jpg
 
 Fold your paper in half, making sure the inside edges are down and the tops are even. If you wind up with the ends of your folds going opposite directions (like the picture in step 3), make sure in this step that the edge pointing “up” goes on the outside when you fold your paper in half, and don’t glue two “up ends” together (in step 5).


Step 5
Step 5.jpg


 Once you have all your papers folded and ready, start gluing the inside edges on each individual sheet, then glue each paper to the next. You’ll want the folded peaks to be seen on the upside and the raw open ends on the underside. Make sure the tops of the folds are nice and even when gluing. If you find you have one end that’s longer or shorter than the other side, simply make sure that one is hidden in the back of the medallion. As long as you glue the top edges of the folds straight, it will look just fine. Once it’s all glued, it should end up looking like this:

Step 5 (2).jpg


Step 6
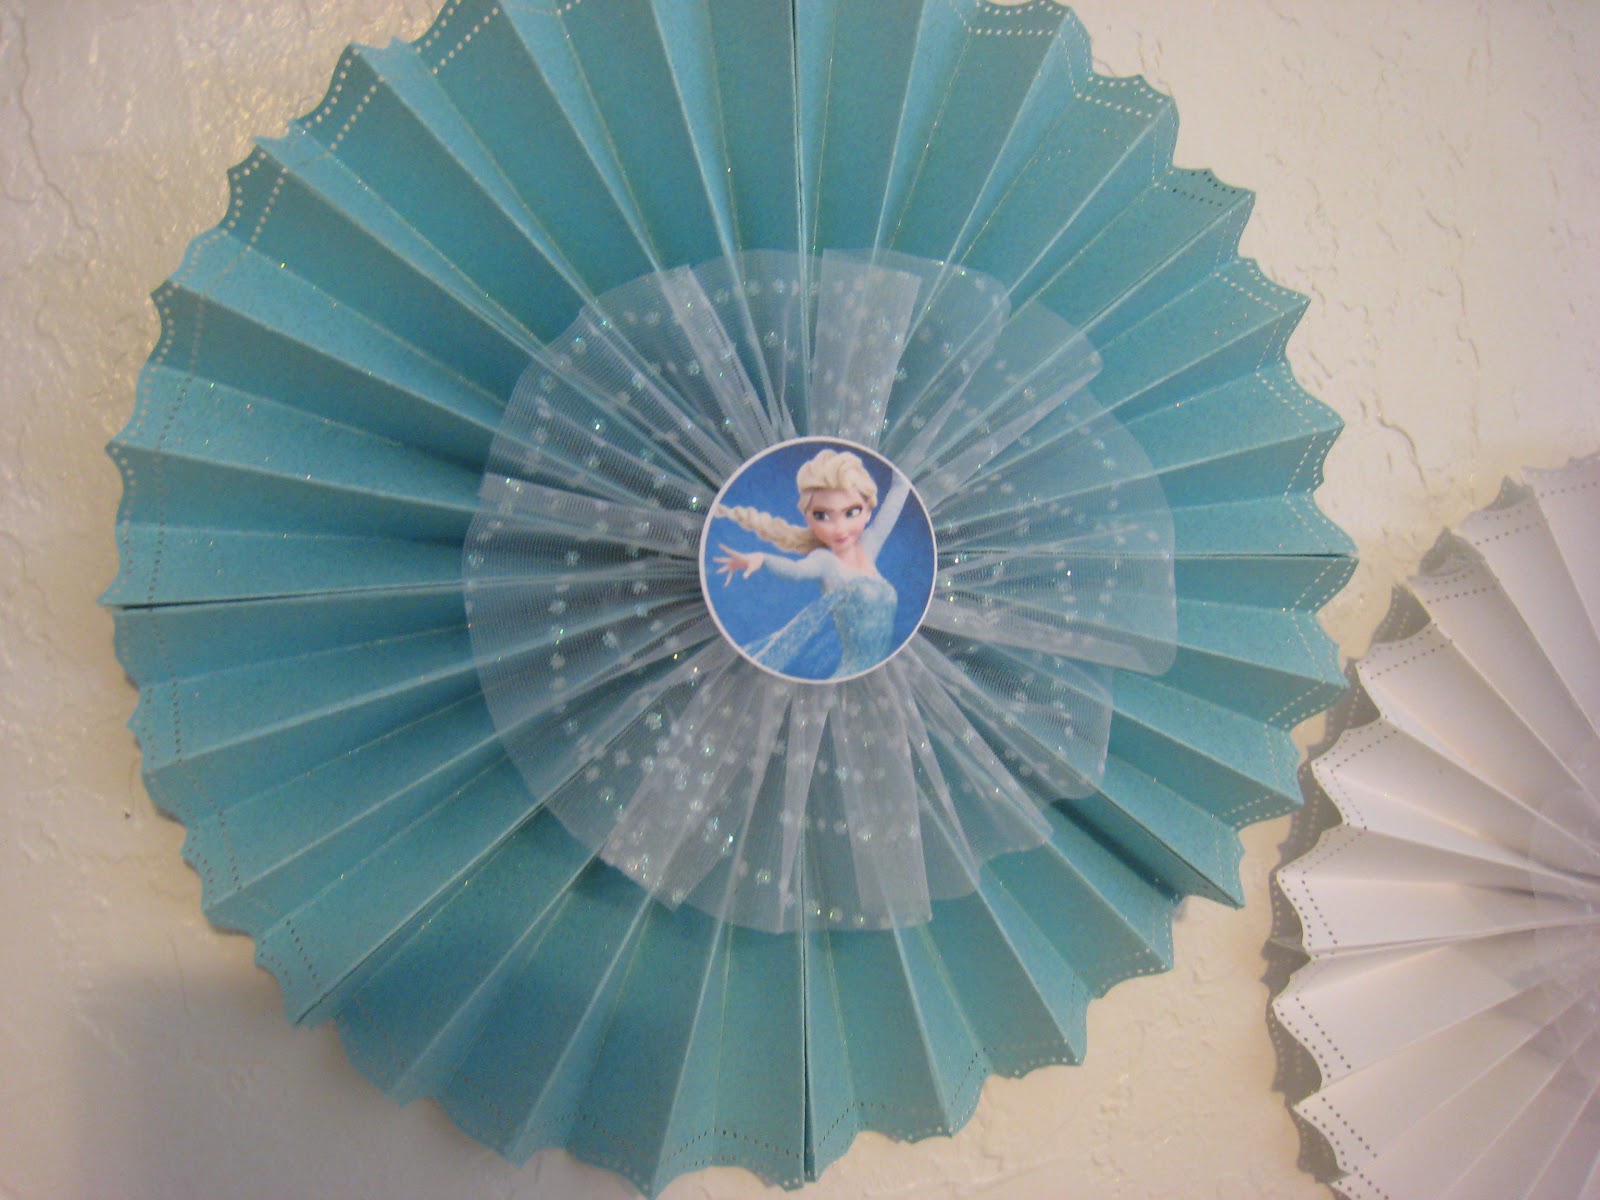
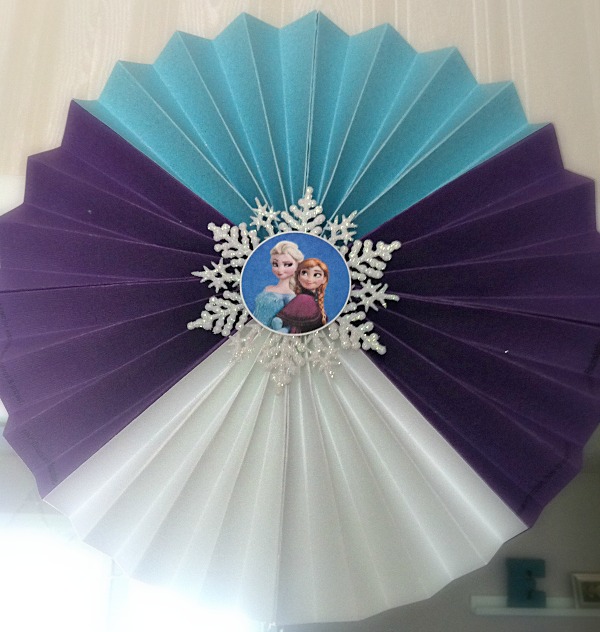
You can leave your medallion looking all funky in the middle like this, or finish it off with some embellishments in the middle. I used tulle, plastic snowflakes from Hobby Lobby and some Frozen themed cupcake toppers found on Great Kids Birthday Parties blog. I have a two inch punch, so those were perfect, but if you want to go a little bigger, these toppers found SKGaleana would look amazing. Print on cardstock.

Step 6.jpg


 For the tulle, cut appx 15 inches from a roll, accordion fold lengthwise (just gather it up with your fingers, this doesn’t have to be perfect), then pinch and tie in the middle. When the tulle unfolds, it will create its own little medallion. Hot glue to the middle of your paper medallion. Then, glue one of the cupcake toppers you printed out earlier on top of the tulle (or snowflake, or whatever you desire). Voila!


 Yes, there are a  LOT of instructions. It all seems very technical until you actually do it and understand the steps. You’ll be pumping them out in no time! Here are some more pictures of the ones I used for my daughter’s Frozen party. Enjoy!


Paper Medallion.jpg
Ana.jpg


Again, I apologize for the crappy photography out-of-date camera

Sisters.jpg

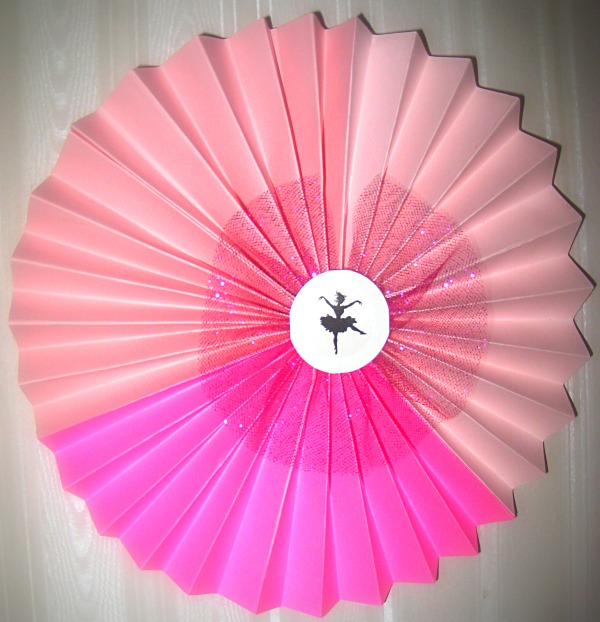
Finally...here’s a pic from my daughter’s ballet themed party that I used 3 12x12 inch papers. I like using the 12x12 better, but that’s just my preference.

ballet medallion.jpg