Showing posts with label home. Show all posts

Saturday, January 3, 2015

Free Printable- Make Your Own Adventure

Make Your Own Adventure.jpg 
 Ah, the new year. A time that holds so much hope...then so much failure. A time when so many people are hopeful that if they make a resolution to be happier, healthier, more organized or successful, they’ll magically wake up the next day and everything will be changed. This is their year (never mind when they fell off the bandwagon two weeks into last year).  Don’t get me wrong, I think resolutions are great. I think self-reflection is one of the most important things we can do. But...have you known anyone to successfully fulfil their resolutions the entire year? Once, I actually made a resolution to not make a resolution so I could actually fulfill it (I think I failed at that one too). See, I’m not hating on anyone, I fall into the same category. Still, as silly as I think it is to make a resolution just to break it, my optimistic side wins and I can’t help but mentally list all the things I’d like to better about myself (I’m not one to actually write them down on paper. They’re much easier to modify if you don’t do that). Haha!


 All that nonsense being said and the fact that my husband watches a lot of TV leads me to the free printable I’m sharing with you today. Wait, what? Yeah, you read that right. Two seemingly random thoughts, but stay with me and I’ll try and build the bridge for you.


 My husband has a relatively stressful job. He is a correctional officer, so he basically has to babysit adults and play mind games all day. That’s not the focus here, but his way of relieving stress and unplugging after a long day is to watch TV. I got to thinking about what it is about TV and movies that is so appealing to so many people. Essentially, we are just watching someone else live a better life than we are. And there it is. If we just got up off the couch and made our own adventure, we would be far more fulfilled, active and interesting than if we just sat and watched someone else’s adventure. And then they would be making movies about us...or maybe just making YouTube videos.


 So...is this your year? Is this the year you’re actually going to join that bowling league, sing more karaoke or yarn-bomb that tree outside your frequented coffee shop? Go do it! Get up and go make your own adventure!

Click here to print

Thursday, October 30, 2014

Why I Painted my Walls the Color I Hate

Let’s talk about how much I loathe white walls. They're so institutional and blah, reminding me of rental homes where they paint the trim the same color as the wall so they don’t need to put any effort or money into paint. Why do they do this in rental homes anyway? Seems to me that white shows the most dirt and scuff marks, so they should paint the homes beige or black (I kid). To me, white walls are a cop-out. It says, “I couldn’t find a color that I like, so this will work.” Don’t get me wrong, there’s a time and a place for white- trim, cabinets, ceilings, prisons...

 Now that I’ve officially offended 85% of Americans, let’s talk about the good aspects of white paint. In graphic design, there’s an area called negative space (or white space *wink*). It’s essentially the blank area of the page/website/whatever that doesn’t contain graphics or information. This can be a powerful tool to designers when they want to make a statement in their creation. They can use the white space as part of their design, sometimes making a bigger impact with more white than less. Ah ha!

 I’m using white on my walls as a graphic designer would. As a statement. I want to accent the other furnishings in the space and highlight the colors in the other rooms. The area that I’m painting white is my entryway. When you look at a pass-through in a home, you need to make sure the color of the wall of the room you’re in complements the adjacent room’s wall color. Are you still with me? From the entry, you can see my kitchen, family room and hallway. Since I love color so much and plan on having a lot of it in the other rooms (the kitchen cabinets will be painted blue someday), I thought white would be a really great alternative to assaulting your eyeballs with a rainbow as soon as you walk through my door. Oh, but don’t worry, I have something up my sleeve…

 Color on the ceiling! Since my realization that I can’t have everything in my house turquoise, I looked for another option to paint my ceiling. I eventually settled on coral and when I picked up a Valspar color inspiration booklet, it solidified my love for this color scheme. Check out this site for a visual. The color I settled on is Dark Mango, but seeing this post from The Smith Nest, I think I need to look for an alternative. Still, here is the color in Dark Mango (photo belongs to The Smith Nest) and the rest of my inspiration for the room:

Dark Mango (2).jpg

I Love this plank wall by Shanty 2 Chic. Though mine will be a bit less “shabby chic”, I like the idea of having something rustic and something to break up the white. (I think it could easily be done with a box of vinyl flooring).

DIY-Plank-Wall.jpg

And these birds!! They tie in the geometric design from the light fixture (see below).
Geometric birds.jpg

Adorable sign from Hobby Lobby that I MUST have. You’ll be able to see it as soon as you walk through the door. How happy is that?

Hello.jpg
Finally...the star of the show! This gorgeous geometric light from Urban Outfitters. When the light turns on, it casts super fun shadows on the wall. The color on the ceiling will draw your eyes up to this little beauty and you might just stand there in the entry admiring it for the rest of your visit. Maybe I should put a chair in there.

Urban Outfitters pendant light.jpg

 There you have it. And now I have white walls (photos of the finished entry yet to come). Tell me...what have you done to your home that you never thought you would?

Wednesday, October 22, 2014

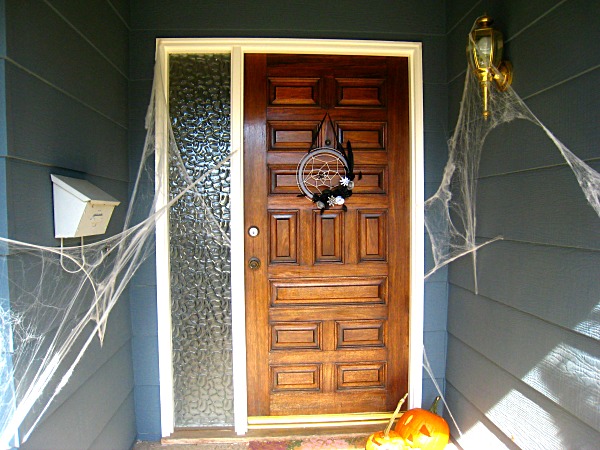
Halloween Spiderweb Wreath

Spiderweb wreath (2).JPG


 Ever hear of the word “Procraftination?” Well, the fact that I’m posting my Halloween wreath a week before Halloween is a prime example. I’m WAAAY behind in the craft world. In blogland, this should have been done a month ago. Like that wise person once said, “Better late than never!”


 I seriously thought about saving this post for a whole year and actually having it prepared for next Halloween, but I just couldn’t wait to share it’s cuteness.


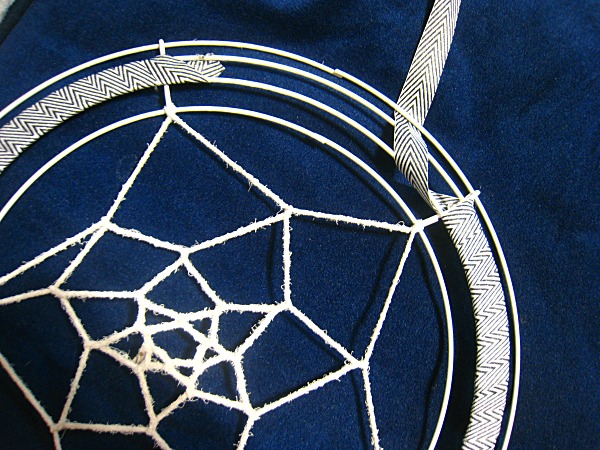
 Have you noticed how popular wreaths are becoming among crafters? Maybe they’ve always been that popular and I’m just now noticing? I thought maybe I better take the plunge and make one myself. Essentially my wreath is just a dreamcatcher turned spiderweb. Come to find out, dreamcatchers are really easy to make, so this project can be done in an afternoon (which is good because you only have a week until Halloween!). I used a couple of pins from Pinterest to help me find what I was looking for. I had to look at a few tutorials before I actually figured out the dreamcatcher/web part. While it is really simple, it’s hard to make a tutorial to show the weaving process. Here are a couple of pins to look at: This one isn’t actually in English, but you really just need the photos to get a good grasp on it. In this tutorial from This Fashion is Mine, the loops are done a little different (that’s the one I used). I think it’s a little more secure than the other, but either is a fine choice.


 You need a floral wire wreath to make your dream catcher. They don’t make these any any other color than green (that I’ve noticed), so you’ll have to spray paint it. I ended up making the spiderweb first and spray painting the entire thing. The wreath is essentially an extension of the web, so painting them both makes a more cohesive look.


 The next step is applying the ribbon. I used about 3 yards of a ⅝ inch ribbon and overlapped it a little as I wrapped. If you use a thicker ribbon, you might not need to use as much, though I wouldn't recommend going too much thicker because it tends to pucker.

Ribbon wrap.JPG


 For the flowers, I found this tutorial from SNAP! for a sort-of ranunculus type flower and copied a couple of flowers from Kiki&Company’s wreath tutorial (which is absolutely amazing). The wreath tutorial requires a Cricut machine (which I currently don’t have), but it was simple enough to make without it. Just fold a small rectangular strip of paper in half and cut fringe along the folded side. Roll, glue and spread out the pedals to form the flower.


 Once you have your flowers, start gluing (with hot glue. I assumed I wouldn't need to specify, but there's always that person)! It’s a little tricky to glue the flowers to the wire wreath and you’ll end up using a lot of glue, but the ribbon helps to have something to secure it to. Once you've got it glued, add your feathers (or your own embellishments).


 Don’t forget your spider!


Spiderweb wreath (3).JPG


Spiderweb wreath.JPG

Thursday, September 25, 2014

Before and After French Door Installation

 When my husband and I moved to our town back in 2009, I had decided that it was temporary and we’d “try it out,” and we definitely wouldn’t be raising our family there. A lot changes in two years I guess, because in 2011 we did what we said we weren’t and bought a house. It was a great time to buy because we could pay just as much for a mortgage as we could for rent. It just made more sense. So, here we are. Our new house is old and along with old, comes funky. It was built in 1969 and it shows. The selling feature that the realtor highlighted was that it had seven ceiling fans. Really? Is that they only thing you could come up with? Maybe she should have added that there’s only paneling on one wall. That would have been a good selling point.


 The cool thing about buying an old house is you can put your own fingerprint on it. We looked at newer houses and while, they’re nice and clean and new, they just aren’t our style (and the neighborhoods are questionable). We’d probably be tearing that one apart all the same. Despite all it’s unattractiveness, we’ve been told by several people that our new home was built really well, plus it has good “bones” and lots of storage (with the exception of walk-in closets).


 There’s such an exhausting list of things that need to be done to this house, it’s hard to know where to start. I’d say the first thing we did was paint the kids’ rooms and tear down those funky 70’s style custom made black-out curtains and accordion doors. All those little things made a difference, but what I really want to show you is the installation of our french doors. It’s the thing that has made the most impact on our living area so far (next will hopefully be flooring).


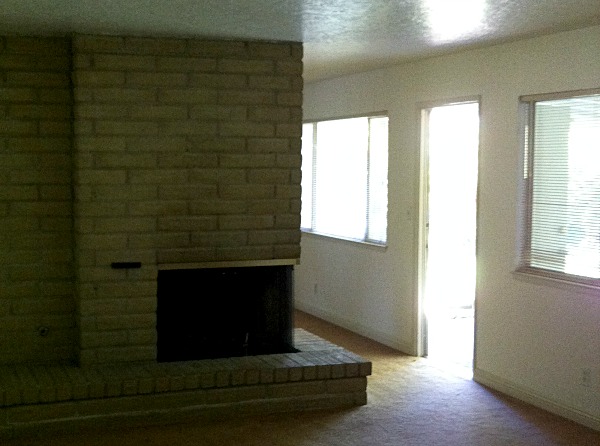
 We used to have one door opening up the the back yard, flanked by two large windows. Yes, the windows were large, but somehow the house still didn’t have a whole lot of natural light and felt really dark. We debated for quite some time on what window we would replace (and keep as a window) and what opening we would put the doors in. I thought the doors would be better put in the room that will one day be our dining room, but my husband thought they would be better going into the living room (Or is it family room? I can never keep those straight). Here’s a before pic of the wall to give you a better idea (watch for an upcoming post on that horrid fireplace). I apologize for the terrible angle, but you get the point.


Backyard wall before.jpg


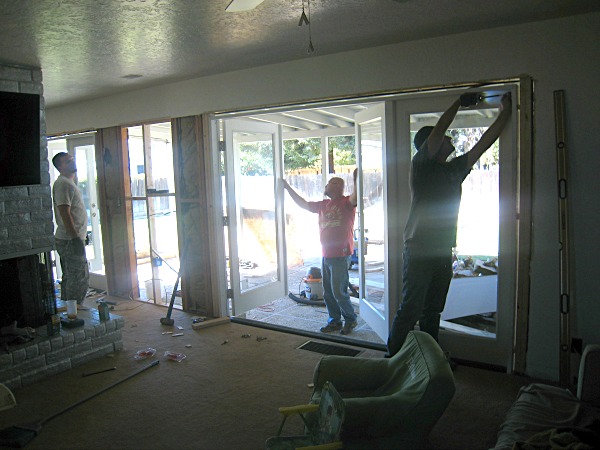
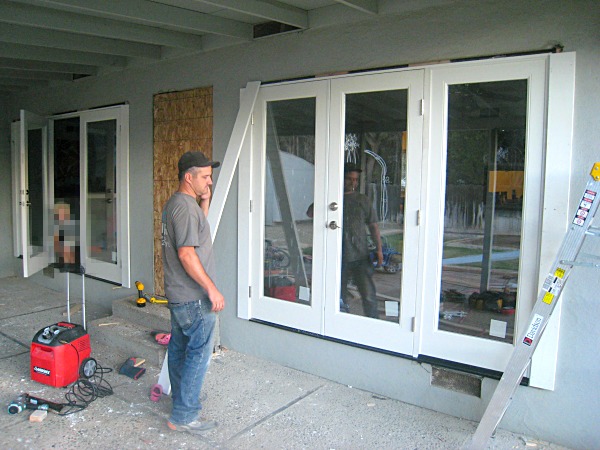
 So here we are trying to figure out which window to turn into a door when...AH HA!...it occurs to me that we can make them both doors! Here we go...


Door Construction.jpg
Door construction (2).jpg


 That guy right there is my brother-in-law and owner of C3 Builders. I can’t tell you how grateful I am for him. He (along with the help of my hubby and dad) finished the installation of both doors in one day. Yep! He’s pretty awesome.


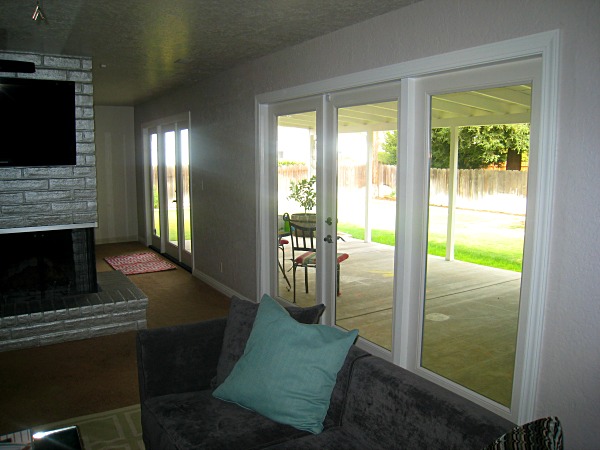
 And now the reveal…
French doors after (edit).jpg


Aaaaaaaaawww! Can’t you just hear the angels singing? Now it’s time to do something about that horrible carpet.