Showing posts with label decor. Show all posts

Saturday, January 3, 2015

Free Printable- Make Your Own Adventure

Make Your Own Adventure.jpg 
 Ah, the new year. A time that holds so much hope...then so much failure. A time when so many people are hopeful that if they make a resolution to be happier, healthier, more organized or successful, they’ll magically wake up the next day and everything will be changed. This is their year (never mind when they fell off the bandwagon two weeks into last year).  Don’t get me wrong, I think resolutions are great. I think self-reflection is one of the most important things we can do. But...have you known anyone to successfully fulfil their resolutions the entire year? Once, I actually made a resolution to not make a resolution so I could actually fulfill it (I think I failed at that one too). See, I’m not hating on anyone, I fall into the same category. Still, as silly as I think it is to make a resolution just to break it, my optimistic side wins and I can’t help but mentally list all the things I’d like to better about myself (I’m not one to actually write them down on paper. They’re much easier to modify if you don’t do that). Haha!


 All that nonsense being said and the fact that my husband watches a lot of TV leads me to the free printable I’m sharing with you today. Wait, what? Yeah, you read that right. Two seemingly random thoughts, but stay with me and I’ll try and build the bridge for you.


 My husband has a relatively stressful job. He is a correctional officer, so he basically has to babysit adults and play mind games all day. That’s not the focus here, but his way of relieving stress and unplugging after a long day is to watch TV. I got to thinking about what it is about TV and movies that is so appealing to so many people. Essentially, we are just watching someone else live a better life than we are. And there it is. If we just got up off the couch and made our own adventure, we would be far more fulfilled, active and interesting than if we just sat and watched someone else’s adventure. And then they would be making movies about us...or maybe just making YouTube videos.


 So...is this your year? Is this the year you’re actually going to join that bowling league, sing more karaoke or yarn-bomb that tree outside your frequented coffee shop? Go do it! Get up and go make your own adventure!

Click here to print

Thursday, November 27, 2014

Free Printable- LOVE

  For the past month or so, my pastor has been speaking about what, "Love Does," and encouraging us to memorize 1 Corinthians 13. No, that's not a typo. He's encouraging us to read the WHOLE chapter. This is something that seems way beyond my capabilities (I'm pretty sure I have the mental capacity of a 70 year old woman when it comes to memorizing). However, I've managed to retain some of the beginning verses. I think I'm through verse 6 now? See, I can't even remember what verse I'm on.  I digress. That all being said, this printable (along with every traditional wedding vow ever written) is inspired by that chapter. Feel free to print at will, but please do not reproduce for profit. Enjoy!


Sunday, November 23, 2014

Thankful For...Gold Flatware

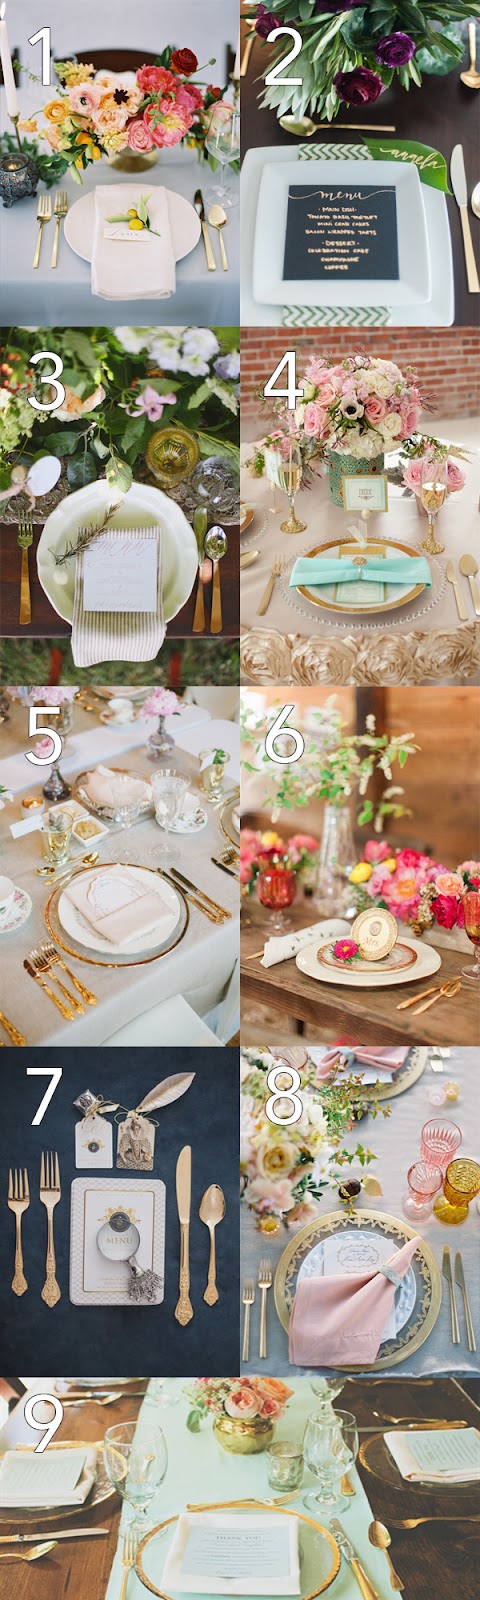
 Here it is. The Holidays. Thanksgiving, Christmas and New Year’s. Are we throwing Halloween in there now? Like most people I know, my hubby and I have to decide between going to my family’s get together or his. Up until recently, he has had to work on holidays, so I’m usually left to do my own thing, (but that’s beside the point). For the past 9 years or so, my aunt has held the baton for the Thanksgiving bash. She has a great house for entertaining. Open floor plan, new construction, high ceiling, fireplace, something I can’t afford...you know the type. Anyway, the one thing you can count on her pulling out for this special occasion is her gold flatware. My first experience with gold flatware was at her house on this very holiday. My emotions were multifarious (nice word, huh? I used a thesaurus). Being someone who loves things that are out of the ordinary, I was drawn to this flatware, but being someone who likes tradition (who am I?), I scoffed quietly at the display. At this point in my life I hated all things gold. I never wore gold jewelry and I most certainly wouldn’t have gold flatware. Since then, my feelings about gold have changed, but that could be a whole different post.


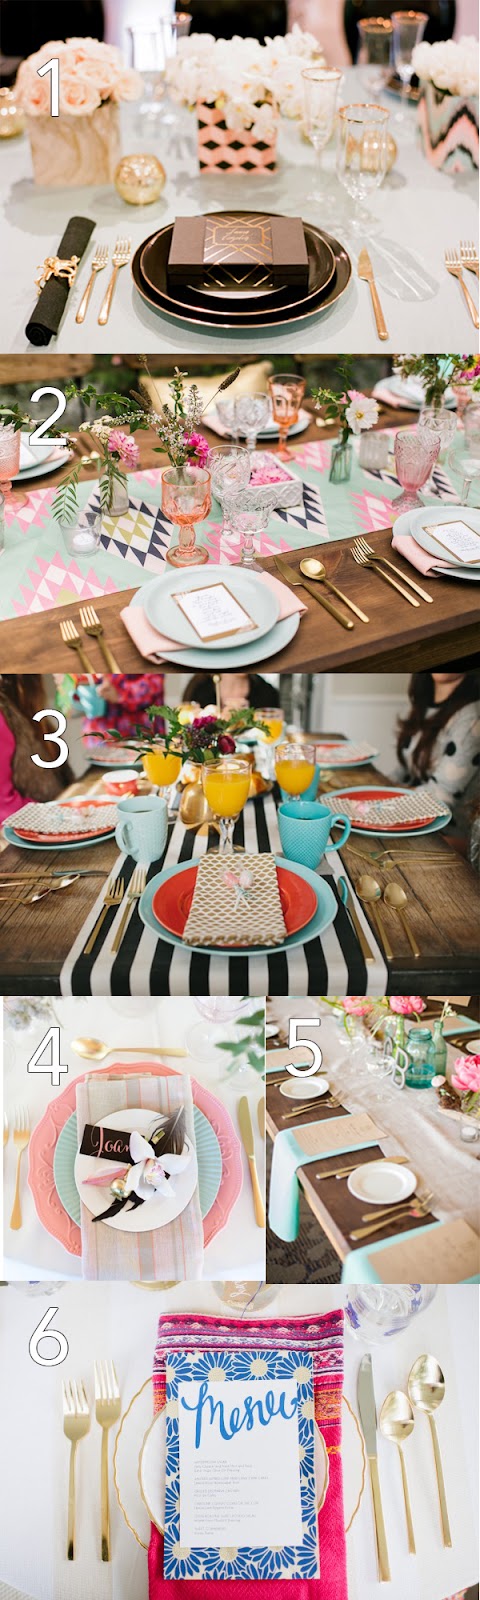
 Thinking about that gold flatware and what she is going to do with the table scape, I’m excited for it to make it’s annual appearance. There are so many lovely things you could do with this flatware. Think of the possibilities! Actually, stop thinking, I’ll show you. I’ve scoured various pins on Pinterest and compiled a lovely collage of ideas for your enjoyment.


Flatware collage black and white-4.jpg


Black and White


Gold flatware natural.jpg


Natural


Gold flatware tea time.jpg


Tea Time


Gold flatware modern.jpg


Mod

Thursday, October 30, 2014

Why I Painted my Walls the Color I Hate

Let’s talk about how much I loathe white walls. They're so institutional and blah, reminding me of rental homes where they paint the trim the same color as the wall so they don’t need to put any effort or money into paint. Why do they do this in rental homes anyway? Seems to me that white shows the most dirt and scuff marks, so they should paint the homes beige or black (I kid). To me, white walls are a cop-out. It says, “I couldn’t find a color that I like, so this will work.” Don’t get me wrong, there’s a time and a place for white- trim, cabinets, ceilings, prisons...

 Now that I’ve officially offended 85% of Americans, let’s talk about the good aspects of white paint. In graphic design, there’s an area called negative space (or white space *wink*). It’s essentially the blank area of the page/website/whatever that doesn’t contain graphics or information. This can be a powerful tool to designers when they want to make a statement in their creation. They can use the white space as part of their design, sometimes making a bigger impact with more white than less. Ah ha!

 I’m using white on my walls as a graphic designer would. As a statement. I want to accent the other furnishings in the space and highlight the colors in the other rooms. The area that I’m painting white is my entryway. When you look at a pass-through in a home, you need to make sure the color of the wall of the room you’re in complements the adjacent room’s wall color. Are you still with me? From the entry, you can see my kitchen, family room and hallway. Since I love color so much and plan on having a lot of it in the other rooms (the kitchen cabinets will be painted blue someday), I thought white would be a really great alternative to assaulting your eyeballs with a rainbow as soon as you walk through my door. Oh, but don’t worry, I have something up my sleeve…

 Color on the ceiling! Since my realization that I can’t have everything in my house turquoise, I looked for another option to paint my ceiling. I eventually settled on coral and when I picked up a Valspar color inspiration booklet, it solidified my love for this color scheme. Check out this site for a visual. The color I settled on is Dark Mango, but seeing this post from The Smith Nest, I think I need to look for an alternative. Still, here is the color in Dark Mango (photo belongs to The Smith Nest) and the rest of my inspiration for the room:

Dark Mango (2).jpg

I Love this plank wall by Shanty 2 Chic. Though mine will be a bit less “shabby chic”, I like the idea of having something rustic and something to break up the white. (I think it could easily be done with a box of vinyl flooring).

DIY-Plank-Wall.jpg

And these birds!! They tie in the geometric design from the light fixture (see below).
Geometric birds.jpg

Adorable sign from Hobby Lobby that I MUST have. You’ll be able to see it as soon as you walk through the door. How happy is that?

Hello.jpg
Finally...the star of the show! This gorgeous geometric light from Urban Outfitters. When the light turns on, it casts super fun shadows on the wall. The color on the ceiling will draw your eyes up to this little beauty and you might just stand there in the entry admiring it for the rest of your visit. Maybe I should put a chair in there.

Urban Outfitters pendant light.jpg

 There you have it. And now I have white walls (photos of the finished entry yet to come). Tell me...what have you done to your home that you never thought you would?

Saturday, September 27, 2014

Before and After: Jessica's Bathroom


Jessica's Bathroom before (text).jpg

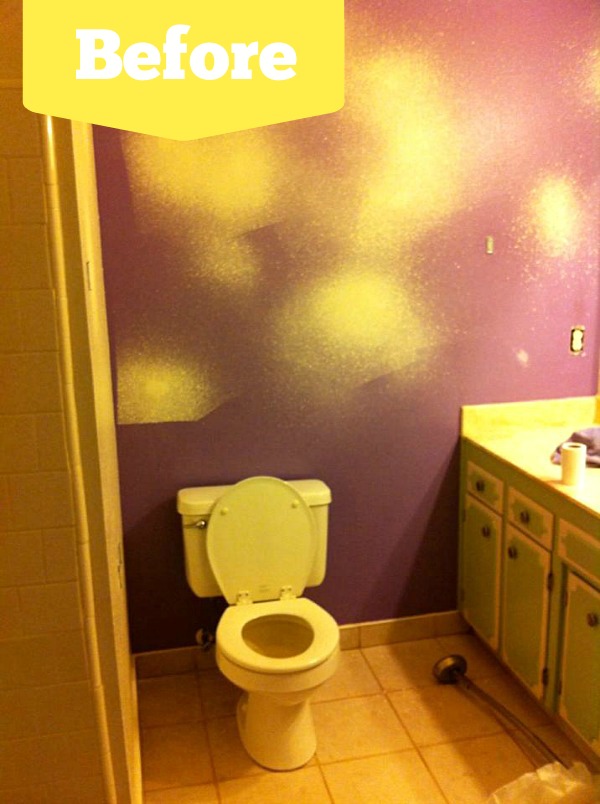
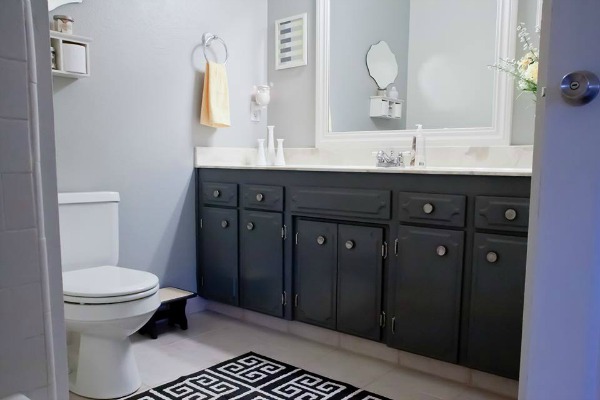
 My friend Jessica is a mommy to 4 children and an amazing photographer. I’m not sure where she found the time to do her mini bathroom remodel , but she’s a crafty girl with an eye for a bargain and good design, so where there’s a will, there’s a way. Would you believe this whole bathroom remodel cost her a mere $83.50?! See the breakdown in what Jessica had to say:  

All the walls and ceiling were painted. The wall behind the toilet and mirror are a light shade of grey, the rest of the walls & ceiling are white ($2.50 for oops paint & leftover white from other rooms). Cabinets were painted a dark grey ($17). Mirror was cut down and framed ($5 to cut, $30 for framing). Repurposed flowers and new yellow ones ($2) and I got new hand towels ($2.50 for 2 at Target this week). I made the little framed art next to the mirror with free paint chips and frames I already had ($0)! New rug from Costco ($13). Mirror above toilet from Goodwill in Turlock, it was brand new in the packaging still ($7.50). Scrubbed the tile & grout today with some heavy strength grout cleaner we already had... it looks brand new! I have one last little project... I bought a large canvas from the thrift store for $4 (someone had started a painting but didn't finish it) that will have a quote of some sort stenciled on it. I'm very proud of how it all turned out... if only it would stay this pretty and clean... I'm sure the kids will have it smelling like a boy’s bathroom soon!

And here is the refreshing after…
Jessica's Bathroom-5.jpg

Jessica's Bathroom-4.jpg
Jessica's Bathroom-6.jpg

Thursday, September 25, 2014

Before and After French Door Installation

 When my husband and I moved to our town back in 2009, I had decided that it was temporary and we’d “try it out,” and we definitely wouldn’t be raising our family there. A lot changes in two years I guess, because in 2011 we did what we said we weren’t and bought a house. It was a great time to buy because we could pay just as much for a mortgage as we could for rent. It just made more sense. So, here we are. Our new house is old and along with old, comes funky. It was built in 1969 and it shows. The selling feature that the realtor highlighted was that it had seven ceiling fans. Really? Is that they only thing you could come up with? Maybe she should have added that there’s only paneling on one wall. That would have been a good selling point.


 The cool thing about buying an old house is you can put your own fingerprint on it. We looked at newer houses and while, they’re nice and clean and new, they just aren’t our style (and the neighborhoods are questionable). We’d probably be tearing that one apart all the same. Despite all it’s unattractiveness, we’ve been told by several people that our new home was built really well, plus it has good “bones” and lots of storage (with the exception of walk-in closets).


 There’s such an exhausting list of things that need to be done to this house, it’s hard to know where to start. I’d say the first thing we did was paint the kids’ rooms and tear down those funky 70’s style custom made black-out curtains and accordion doors. All those little things made a difference, but what I really want to show you is the installation of our french doors. It’s the thing that has made the most impact on our living area so far (next will hopefully be flooring).


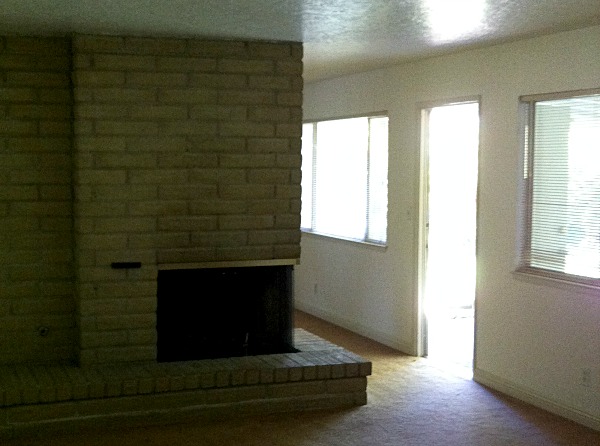
 We used to have one door opening up the the back yard, flanked by two large windows. Yes, the windows were large, but somehow the house still didn’t have a whole lot of natural light and felt really dark. We debated for quite some time on what window we would replace (and keep as a window) and what opening we would put the doors in. I thought the doors would be better put in the room that will one day be our dining room, but my husband thought they would be better going into the living room (Or is it family room? I can never keep those straight). Here’s a before pic of the wall to give you a better idea (watch for an upcoming post on that horrid fireplace). I apologize for the terrible angle, but you get the point.


Backyard wall before.jpg


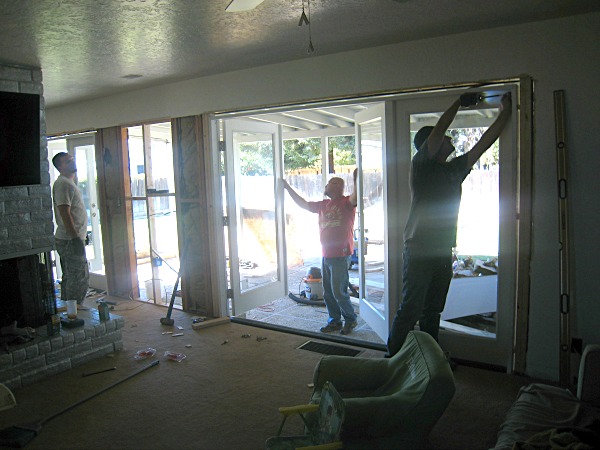
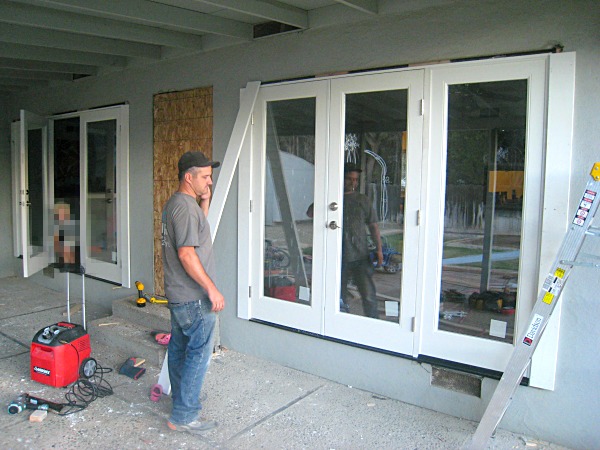
 So here we are trying to figure out which window to turn into a door when...AH HA!...it occurs to me that we can make them both doors! Here we go...


Door Construction.jpg
Door construction (2).jpg


 That guy right there is my brother-in-law and owner of C3 Builders. I can’t tell you how grateful I am for him. He (along with the help of my hubby and dad) finished the installation of both doors in one day. Yep! He’s pretty awesome.


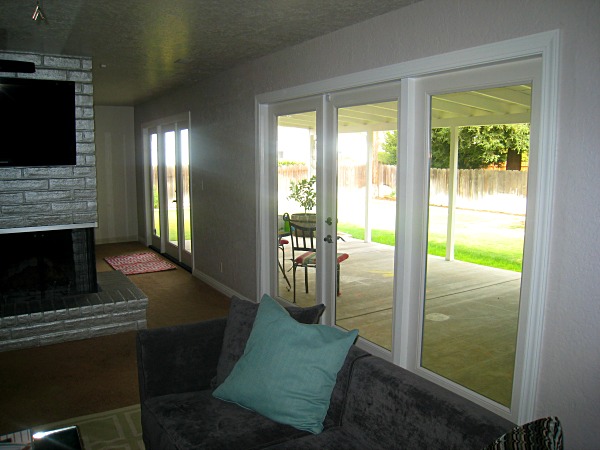
 And now the reveal…
French doors after (edit).jpg


Aaaaaaaaawww! Can’t you just hear the angels singing? Now it’s time to do something about that horrible carpet.

Sunday, September 21, 2014

Punch-A-Prize

 Awhile ago we started buying cleaning wipes from Costco. You know, the Clorox or Lysol kind. Well, I began collecting the empty containers thinking there must be something I can use these for. I guess I was using an abnormal amount of wipes cleaning a lot because I they piled up pretty quickly. I had quite the collection when it came time to plan a birthday party. This might be a good time to pause and tell you how I feel about goodie bags. There’s the kind of mom who loves goodie bags. They’re simple, pre-packed (most of the time) and fairly inexpensive. They love to send the attending kids home with a “thank you for coming” gift and I think that’s great. I do too. Then, there’s the kind of mom like me, who loathes goodie bags. The kids come home with these candy-filled bags with cheap toys that they play with for 10 minutes, then leave scattered all over the house. Being the frugal person that I am, I don’t like to throw things away, so there they go, into the toy bins on the bookshelf to waste space. In the end, it’s all about the kids, so I graciously take the goodie bag and ohh and awe over what’s inside as my children pluck each one out of the bag and throw it on the floorboard of my car. I’m not trying to bash the goodie bag mom. I’m just trying to come up with more original prizes the kids can use (or use up) and not be hated by other moms like myself.

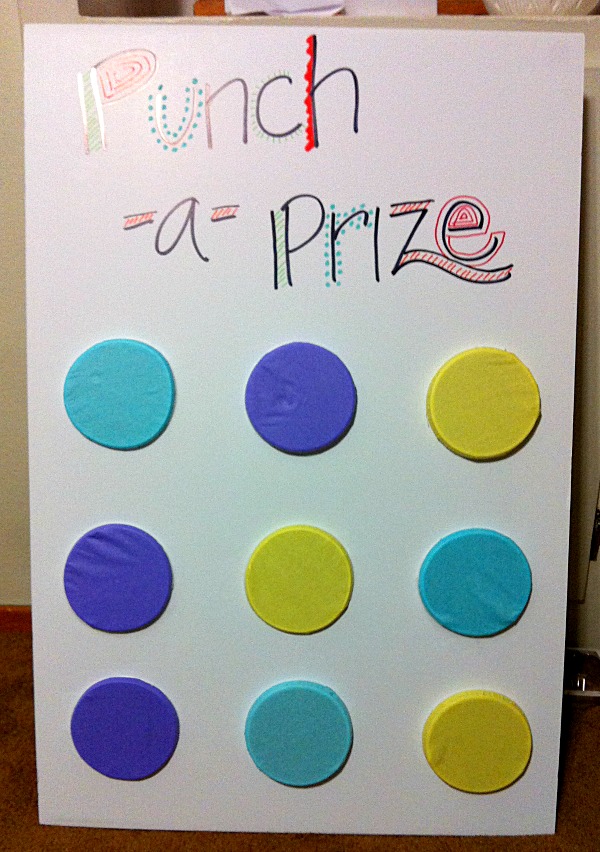
 Back to party planning. I didn’t have a pinata and I had tons of these wipes containers (and a severe hatred for goodie bags). That’s when the Punch-A-Prize was born!

 I don’t know whether to call it a game or some sort of prize dispenser. We’ve used it to let the winner of each party game get their prize. I suppose it could be a game in and of itself. It’s like a pinata, in a way. The kids have to do some sort of activity to get the prize out. Perhaps that’s why the love it so much. And love it, they do!

Supplies:
Foam core board
9 empty wipes containers (without lids)
Tissue paper
Scissors
Exacto knife or box cutter
Wrapping paper (optional)
Prizes

Step 1
Step 1.jpg

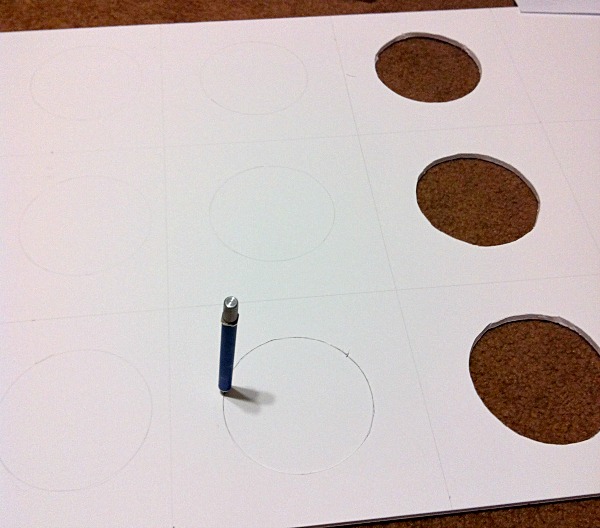
 Draw a grid on what will be the backside of the foam core board. You’ll want to end up with a 3x3 grid (you’ll actually end up with a 3x4 because the board isn’t a square). If you’re not a perfectionist, you can just eye-ball this part to save time. Place your containers upside down between each square until they look even. Trace the containers and cut. Note: you want to put the containers upside down because you’ll be punching them through the holes you cut. The bottoms of the containers are smaller, so it won’t work right if you cut the holes from that end.

Step 2
Step 2.jpg

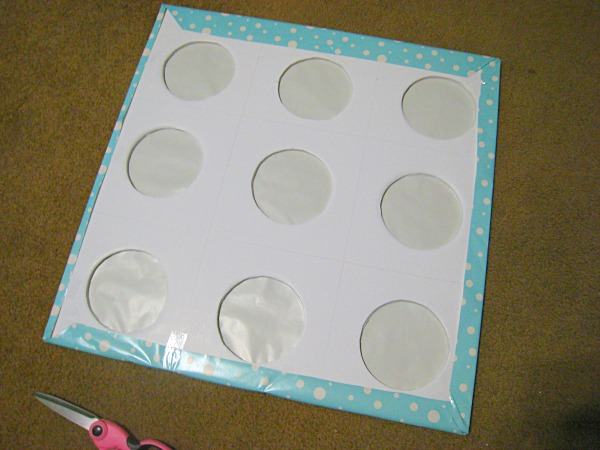
 I re-used this board from another party, so at this time, I covered it in wrapping paper and re-cut the holes. If you want, you can do this in step 1 before you cut the original holes.

Step 3

Step 3.jpg

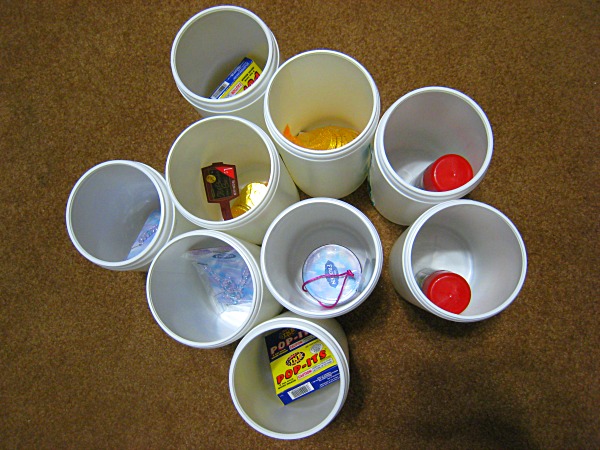
 Fill your containers with prizes. I used pretty neutral prizes (silly string, pop-its and chocolate coins), but since this was for my daughter’s party, I had some girly ones stuffed in there too. She still had boys at her party, so  I’ll show you how to deal with it if you have a mix-gendered party.

Step 4
Step 4.jpg

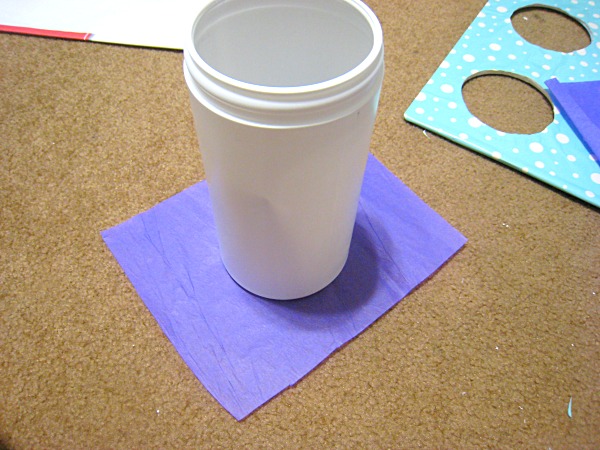
 Cut some tissue paper a little larger than the container opening. Here’s the part, if you have prizes that are geared specifically toward one gender, you can coordinate the color of your tissue paper with the prize inside (i.e.- pink for girl prizes, blue for boys and white for either). Note: you only need one layer of tissue.

Step 5
Step 5.jpg

 Cover the container opening with tissue and punch it through the back of the foam core board. It’s easiest to do this one at a time with the container on a flat surface and the board on top. Be sure to press on the board right next to the container or you risk breaking the board. Once you poke them all through, you’re done! Note: If the tissue is on the thicker side, it may be a little hard for the little ones to punch through. You can solve this problem by poking a tiny hole in the middle with a straight pin. Also, this can be pretty tricky to place, so I used my daughter’s easel frame and it worked perfect!


 Since I forgot to snap a pic of the final product, here’s the aftermath. She had a Frozen themed party, so I decorated it with some sparkly snowflakes.

After.jpg

 Here’s another one that I’m embarrassed to show you I didn’t have a lot of time to invest in. I’d love to see your own rendition!

Final.jpg